Teaching, Competing, Exploring: A Robotics Story
21 min read
July 10, 2023
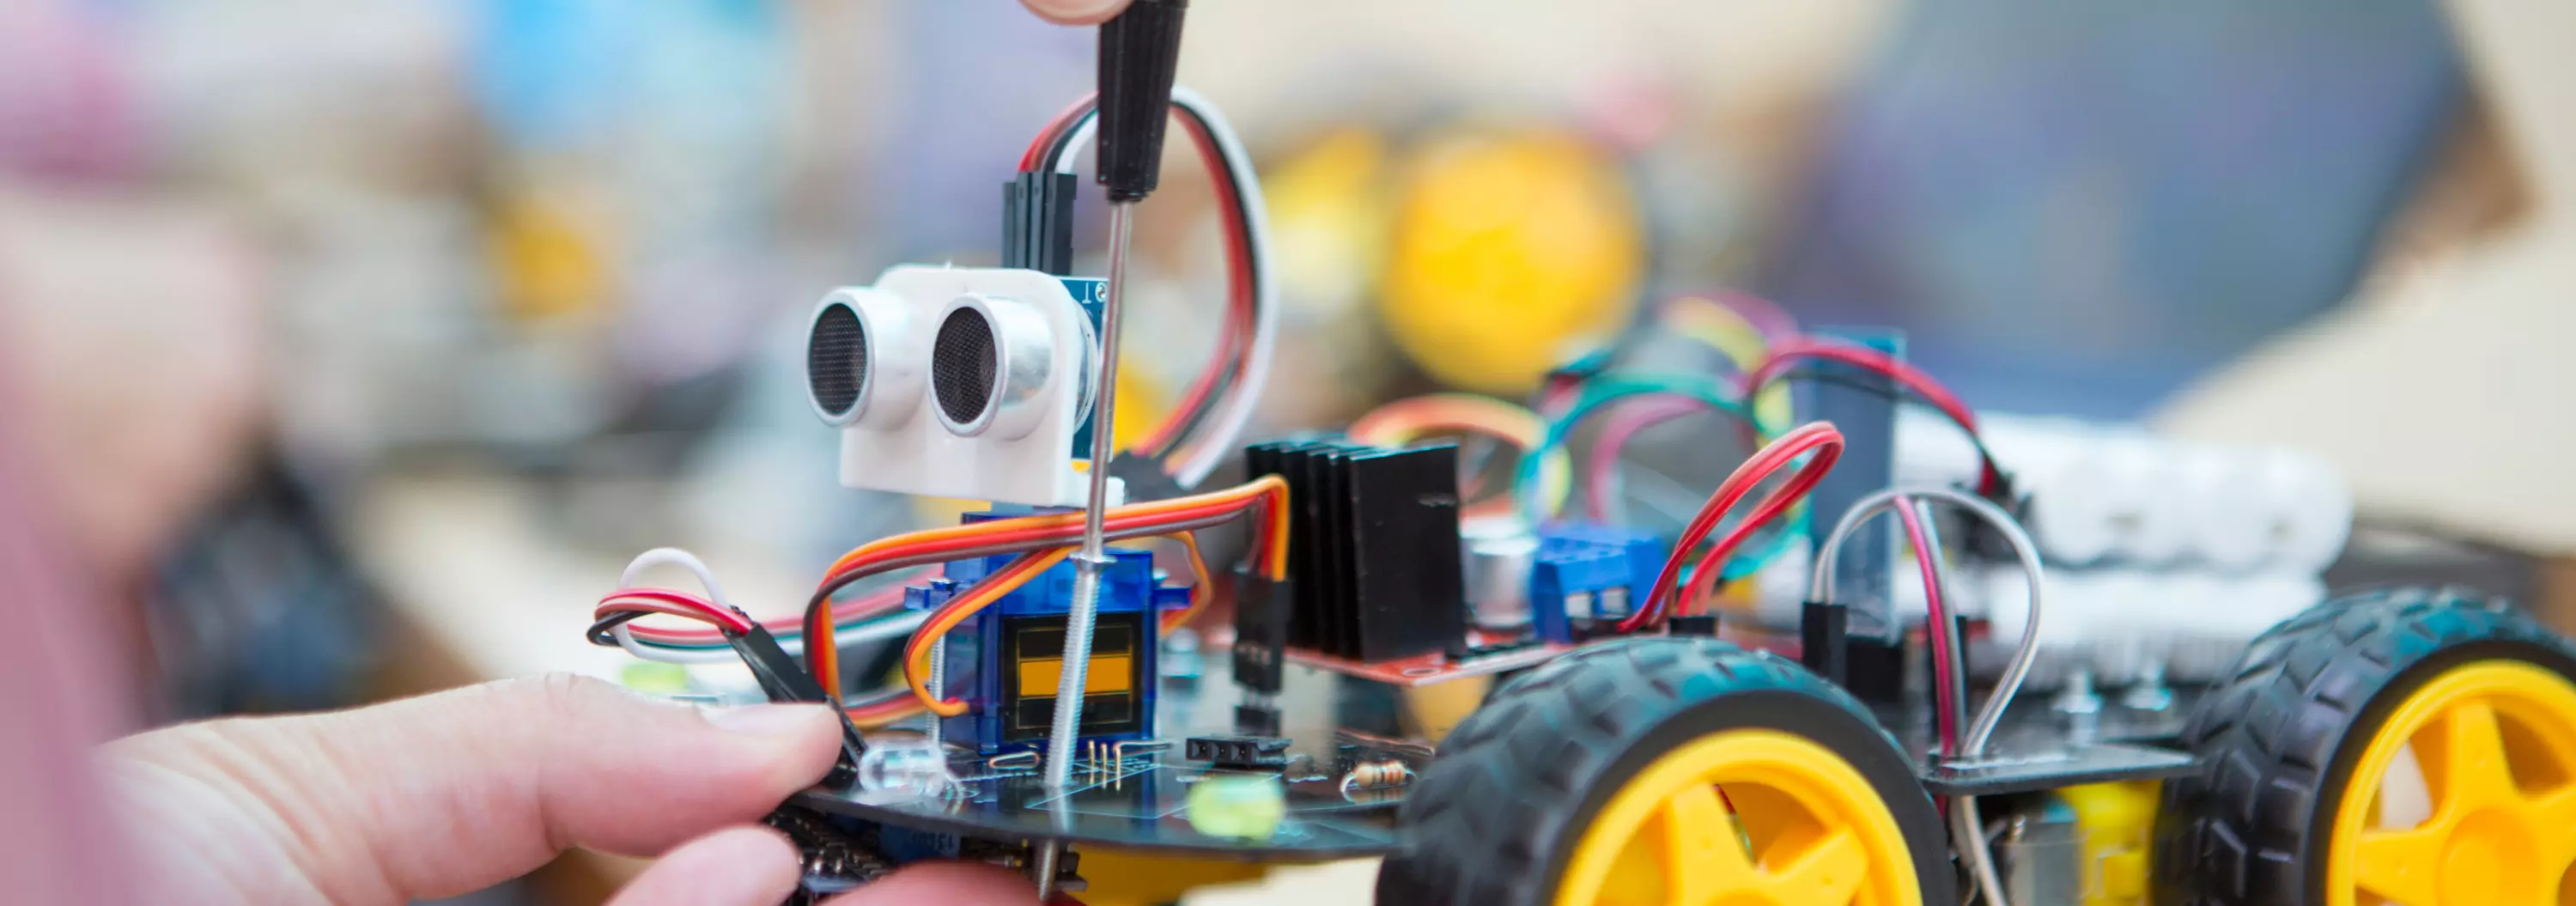
I've always been interested in robotics. The multidisciplinary nature of connecting physical things together, writing code, and watching everything play its part to form the larger creation is... magical. The first real thing I built was a Micro:bit-controlled RC buggy that could also follow lines and avoid obstacles. It changed my life. 5 years on, I'm sharing that spark of joy with younger inventors in the hope that they find their new passion and get inspired to achieve incredible things in the world of electronics, robotics, and engineering.
In August 2022, I was chilling at home coding this very website when a teacher of mine emailed me saying he had ideas for a robotics club the following year, and secured a small budget to spend. As we brainstormed and discussed options, he shifted the club to become a student-led affair. I just knew I had to grab Dom to help me out with this, and together, we took on the challenge.
The aim was to create a sort of competition with weekly drop-in sessions (run by us), where teams of 2 or 3 Year 9 students would be working to design, build, and program a buggy that could solve a line maze. They'd be scored on various factors, so it wasn't all about the fastest solve time: we wanted to encourage them to learn and experiment as much as possible. Anyway, let's dive straight in for a more comprehensive look at what we worked on!
Preparation
The initial conversation involved bouncing ideas off each other. It started with ideas around using cameras in an arena to push balls into a designated section, before progressing to the concept of a line maze. We needed to strike the balance between a challenging project with lots of scope for optimisation, and something that was achievable by most. Oh, and we also didn't want the project to be well-documented online, otherwise contestants could just copy code, algorithms, and designs from others - we wanted them to think creatively and come up with novel solutions themselves.
Once the theme was locked in, we spent hours choosing the best components. We planned for 10 teams, in addition to spare kit (someone's bound to break something) and another set or two for ourselves. The budget was tight - we were given £500 to buy everything and award as prize money to the podium places.
We wanted the teams to learn how everything fit together, breaking down the "black box" of robotics, so we settled on buying each individual component as opposed to pre-made kits (which tend to cost more). In the end, we managed to get it down to about £300 for all the kit! After careful consideration, we bought some TT motors, wheels, IR sensors, breadboards, AAA batteries, battery holders, wires, L298N motor driver boards and finally the Raspberry Pi Picos.
The Picos were chosen for their versatility, low cost, ease of use, and our previous experiences with it. It was the perfect microcontroller for an introduction to robotics. Oh, and they were actually in stock!
Once the kit arrived, we split them into 12 packs (10 teams + 2 of us). But our advertising for the competition ended up being too effective, and we got 12 teams signing up! Deciding to give the late sign-ups an opportunity to participate, we desperately threw together another 2 kits, sacrificing components from our own (we had similar parts lying around at home anyway) and exhausting our spares.
In parallel with all this, we were also sorting out the details of the robot and the maze - we needed to ensure the task was feasible, and be comfortable with everything ourselves so that we could mentor the teams effectively. After a brain-frying amount of thought and discussion, we felt like we had a good plan for the year, and overcame the technical challenges which initially seemed would plague the project.
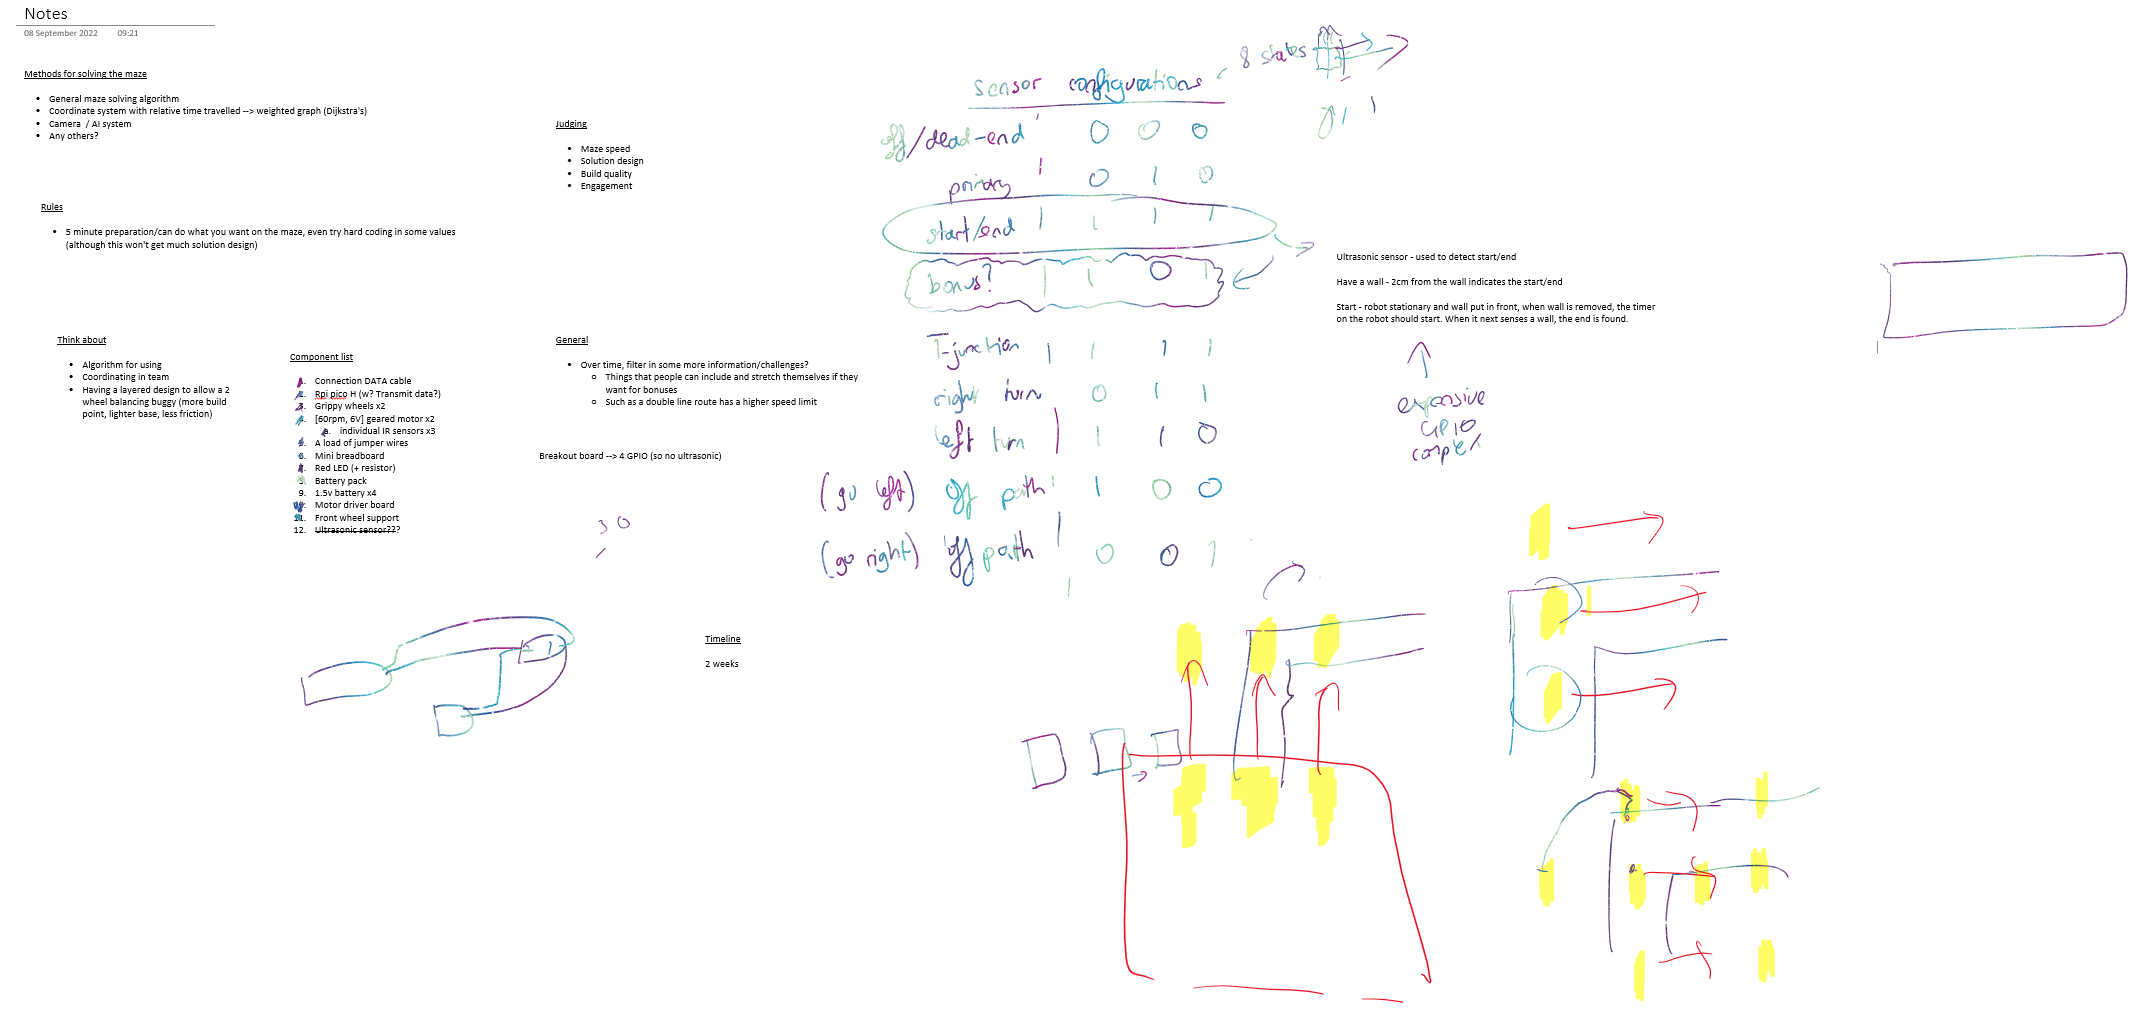
A snapshot of notes from our planning meetings - bursting with random thoughts, checklists, and approaches to solving problems.
Essentially, each team would receive a kit containing all the components they'd need. We'd run a few lessons with the teams to teach them all the basics and how to get started. After putting the circuit together, the teams would design a base/chassis for the buggy and program it to complete the challenge. The challenge was to solve an unseen line maze as fast as possible - so the buggy would need to do a 'recon' run beforehand to memorise the maze and find an optimal path, before doing a timed speedrun. Finally, we had a clear vision.
So now, the only thing left to do was to launch the competition and start the sessions!!
Diving In
The first lunchtime, standing in front of a bunch of noisy Year 9s crammed into a small ICT room was when the competition really began to feel real! We knew that the first sessions were really important to minimise dropouts. We started with the basics; handing out the kits and introducing the Picos. After some (minor) technical difficulties with the wrong USB connectors, we finally got the teams up and running with IR sensors. It was wonderful to see the joy on their faces when they first wired up an IR sensor and saw its LEDs turning on and off as they waved their hand over them.
We aimed to spend the first 4 weeks or so having compulsory sessions, where teams would learn the basics of robotics as we introduced each component in turn and they took baby steps towards the end goal. Then, the lunchtime sessions would become optional as teams work in their own time but can always drop-in for support.
The initial sessions were very chaotic and we fought to maintain control, but most of the teams managed to complete all the key tasks - success!
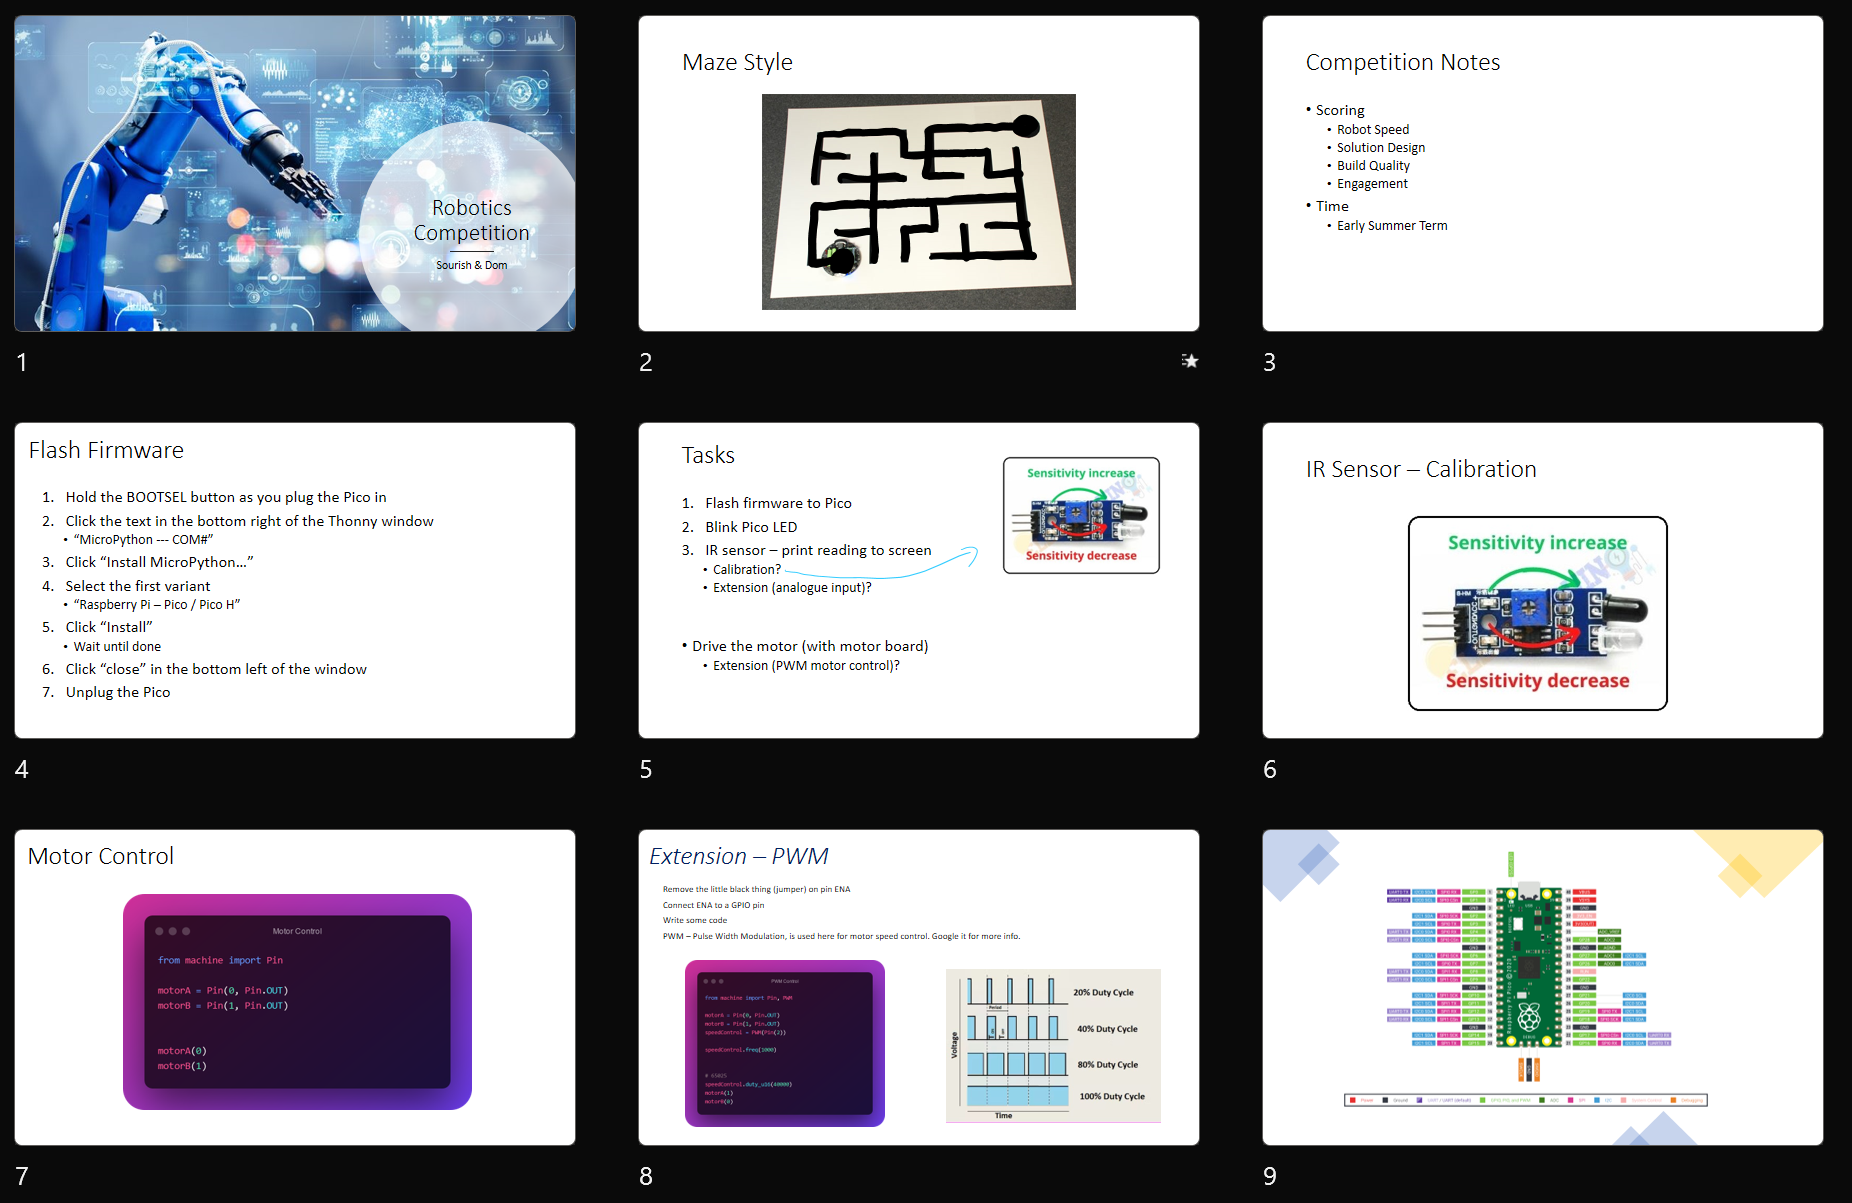
The second PowerPoint - encouraging teams to try out some hands-on challenges.
But, as teachers would know, different teams had different levels of experience. This meant that some teams raced ahead and had completed all of our challenges immediately whereas others needed more help. The teams at either end of the spectrum probably got a little bored and dropped out quite soon into the competition, but we had a healthy 8-9 left by the time everything had settled. So now we knew that there would be a competition, we just had to make sure it was as fun and inspiring as possible, which was harder than we thought…
The Technical Bit
With the projects underway, it is now important to outline how we went about building our own maze-solving robot, which we did almost directly in parallel with the teams - we were planning and adapting the competition as we participated in it ourselves and identified difficult aspects with potential solutions.
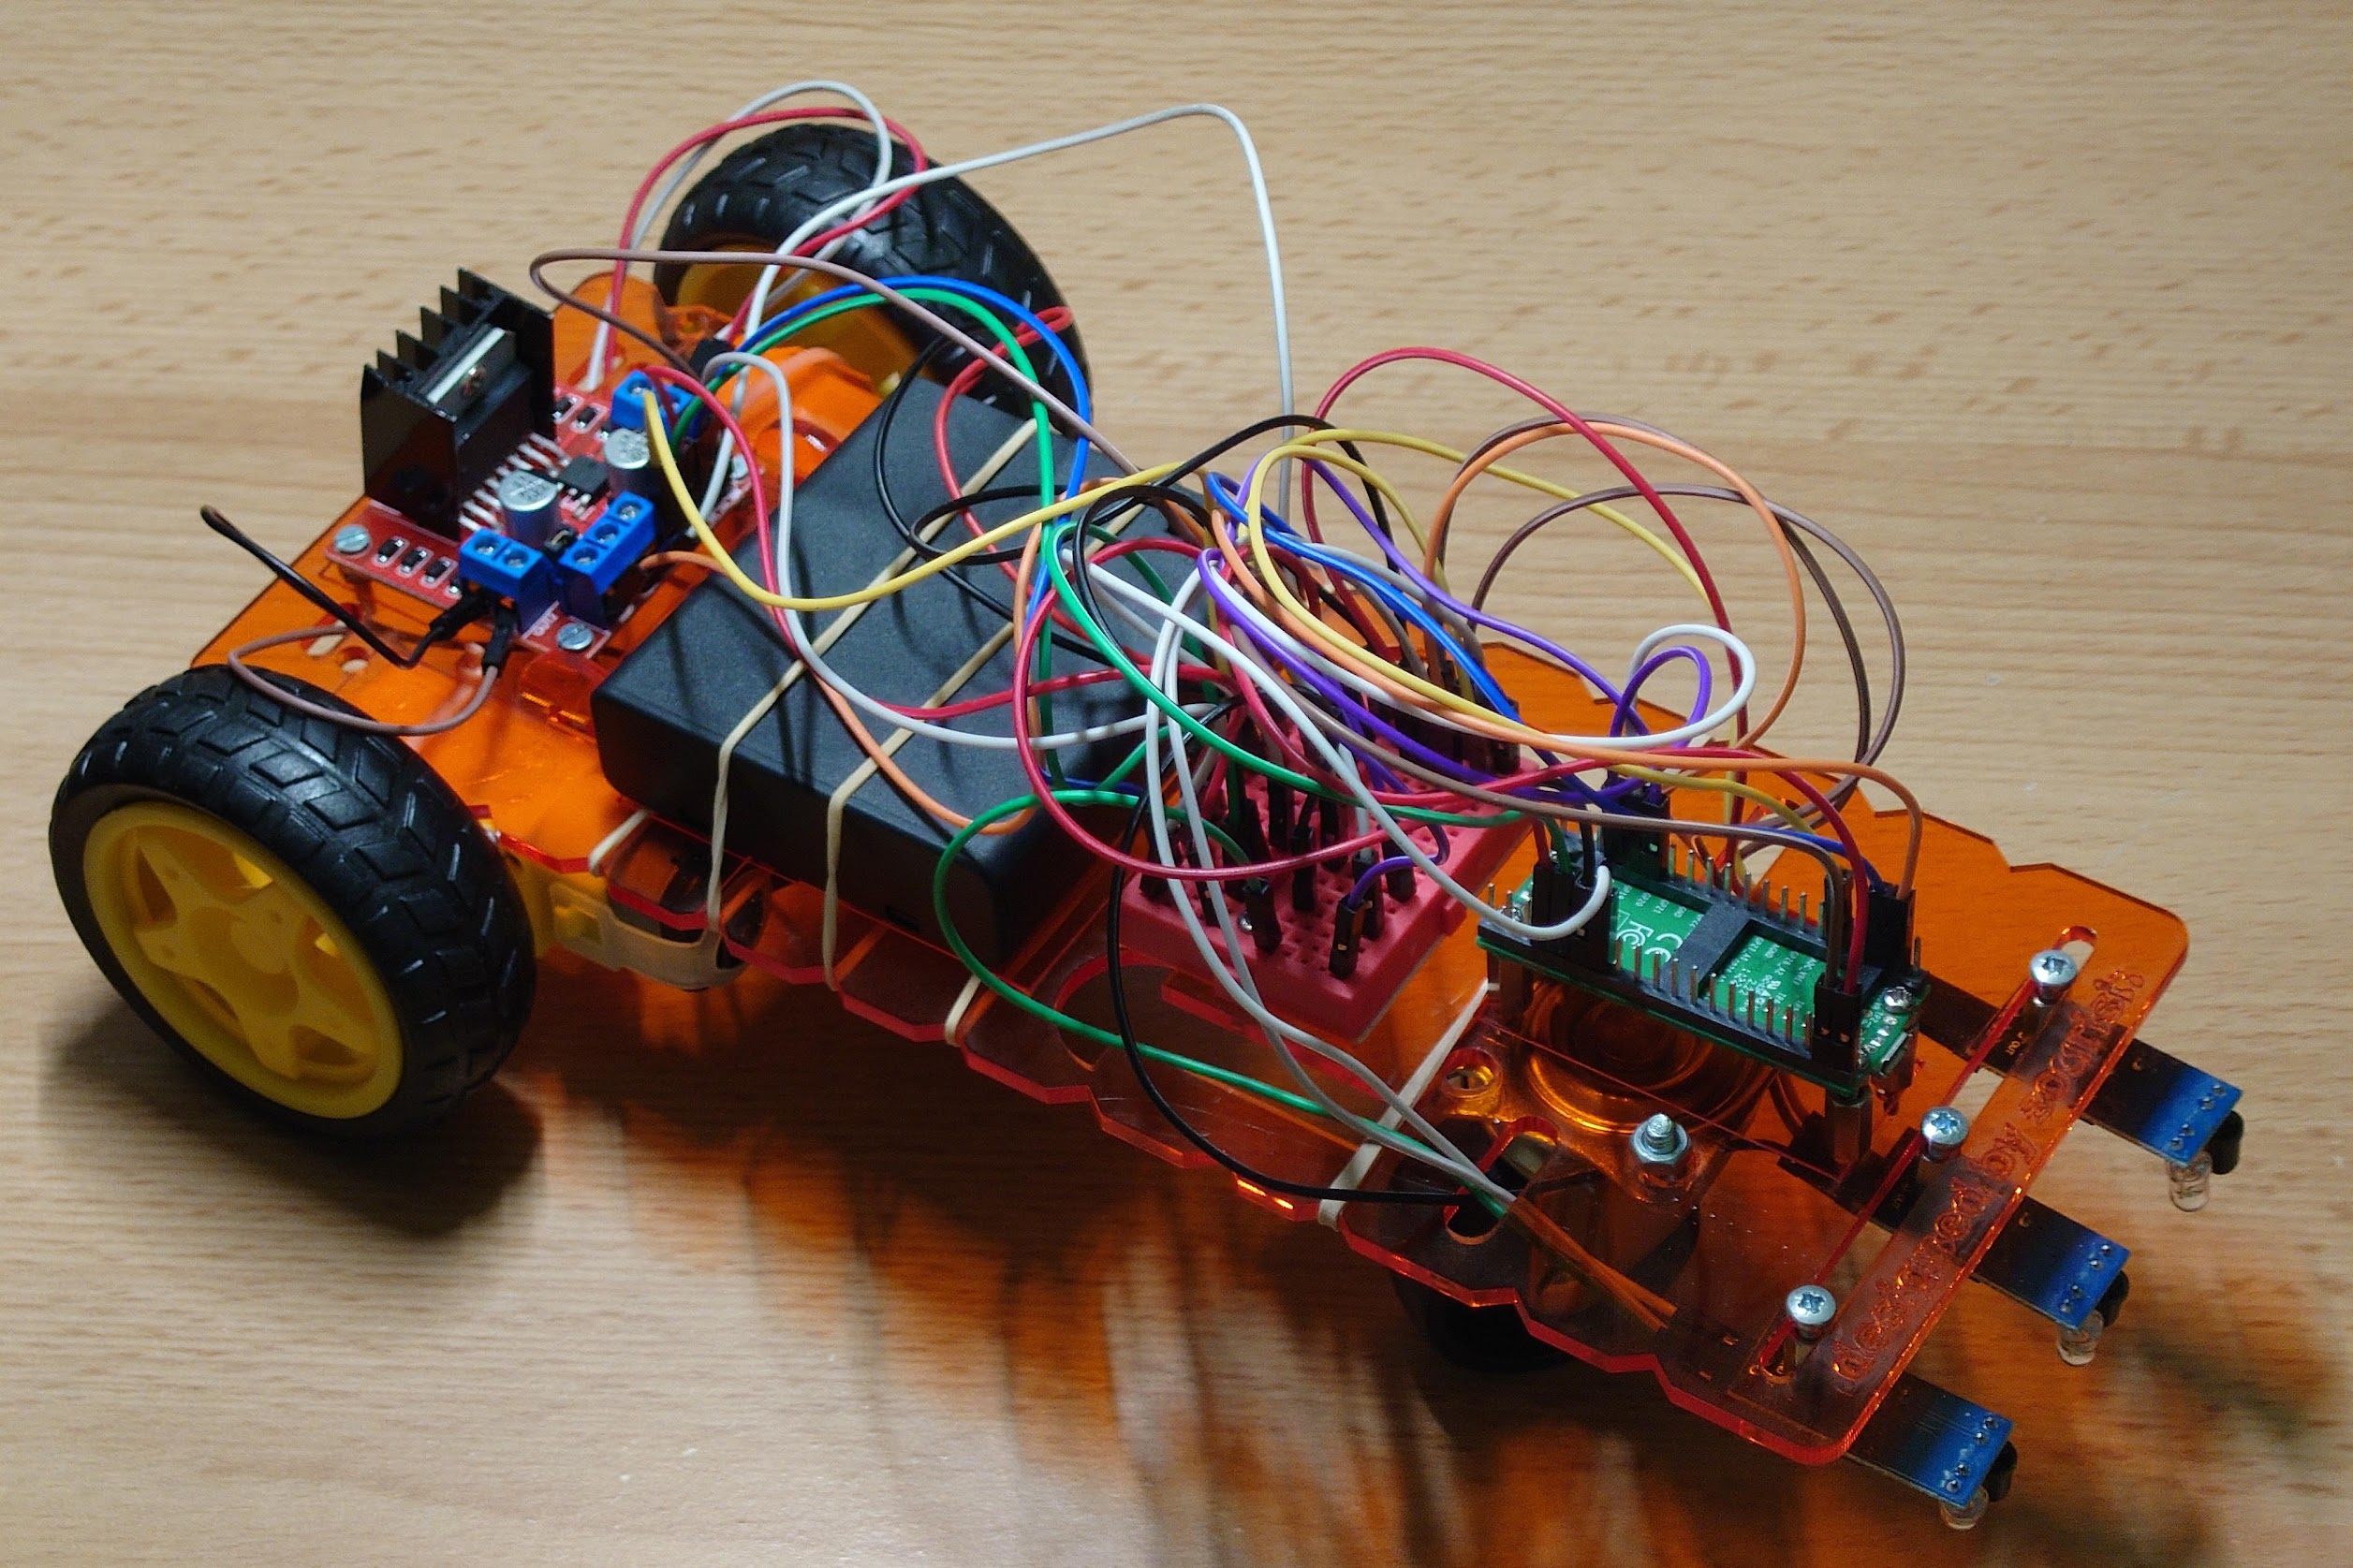
Our demo robot. See if you can try and figure out how everything works!
First off, we'll talk about the chassis design. There's nothing too special here, as we rushed to create ourselves a base to get a visibly complete robot ready for the first session, ready to inspire the teams. It started with some Googling to get an idea what the base could look like, before a quick sketch of the layout.
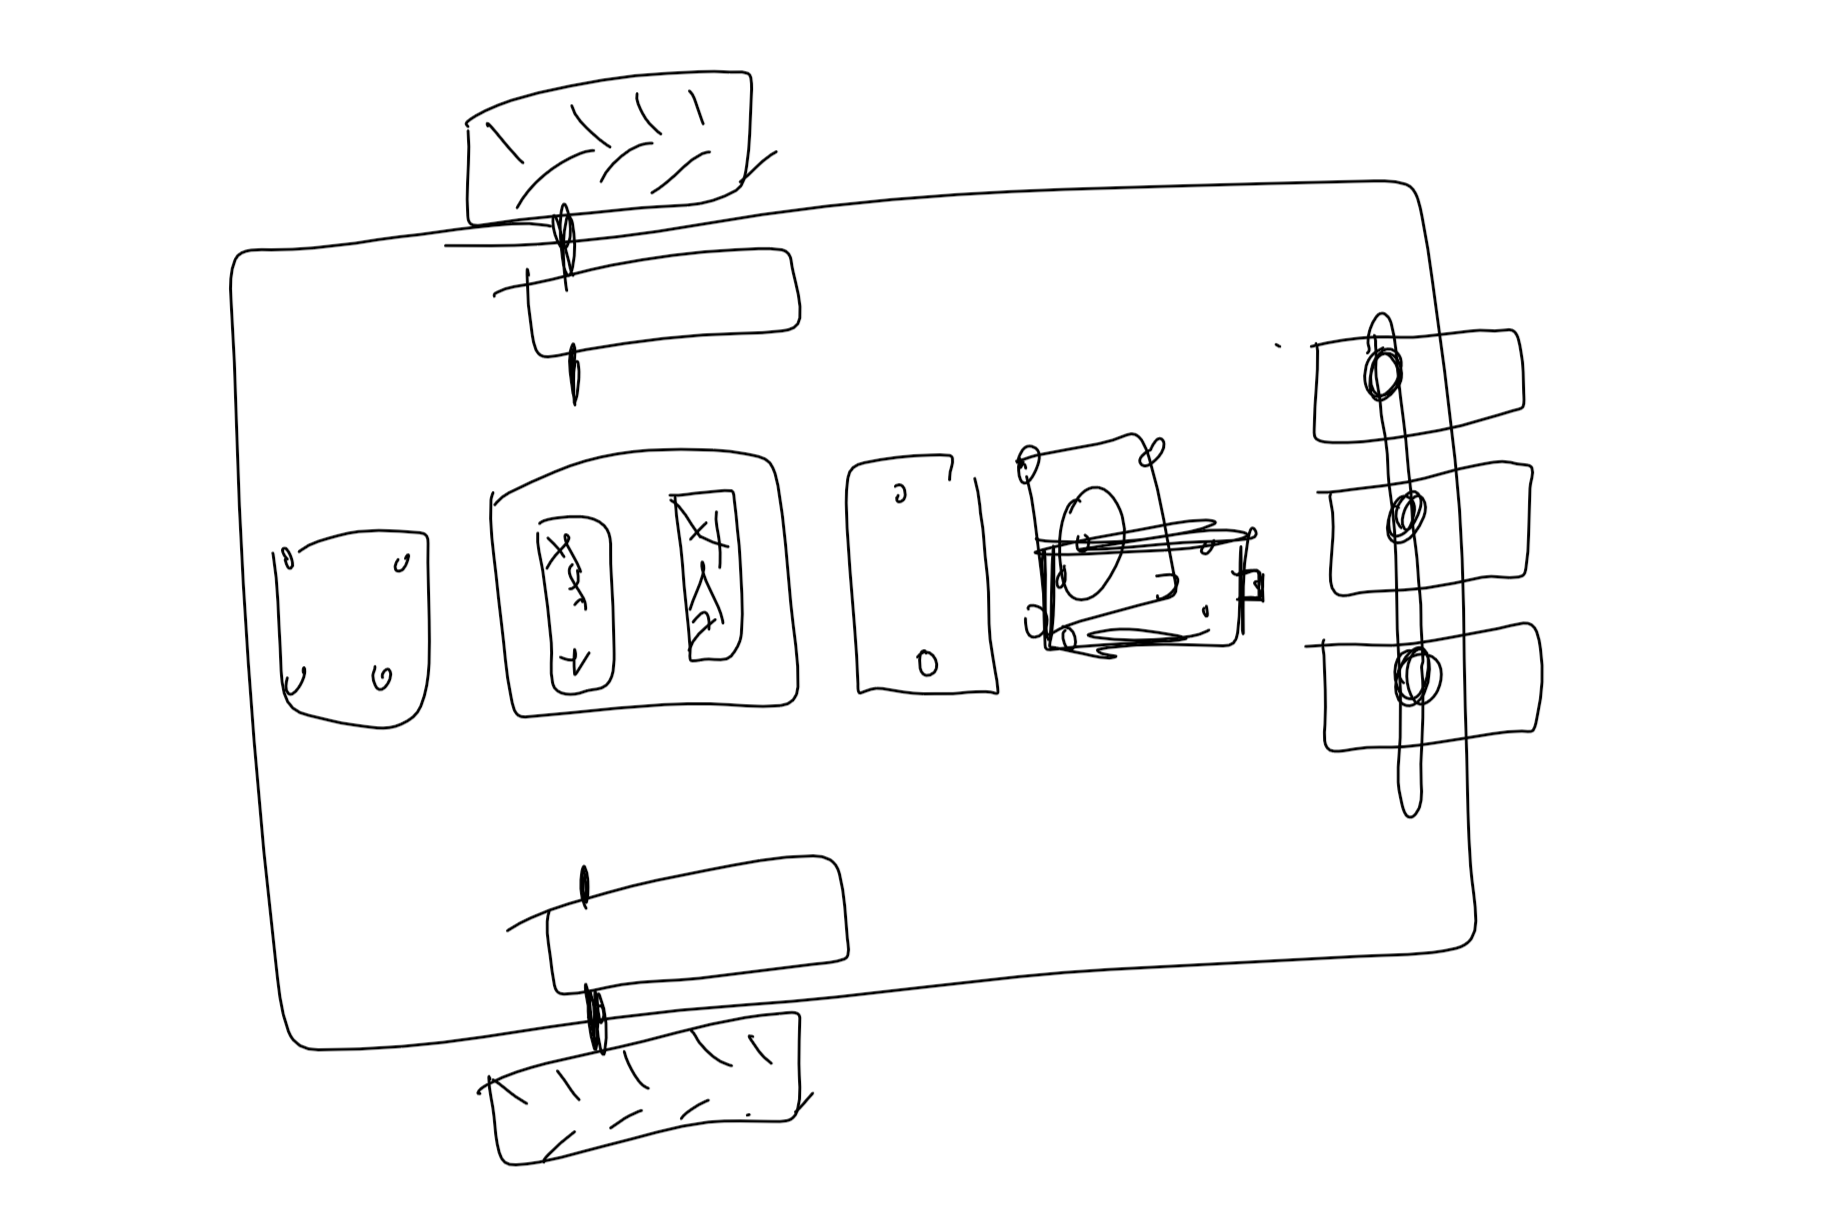
The first sketch of our base - we were so tight on time that we didn't have any more sketches!
We turned that into a CAD model on 2D Design.
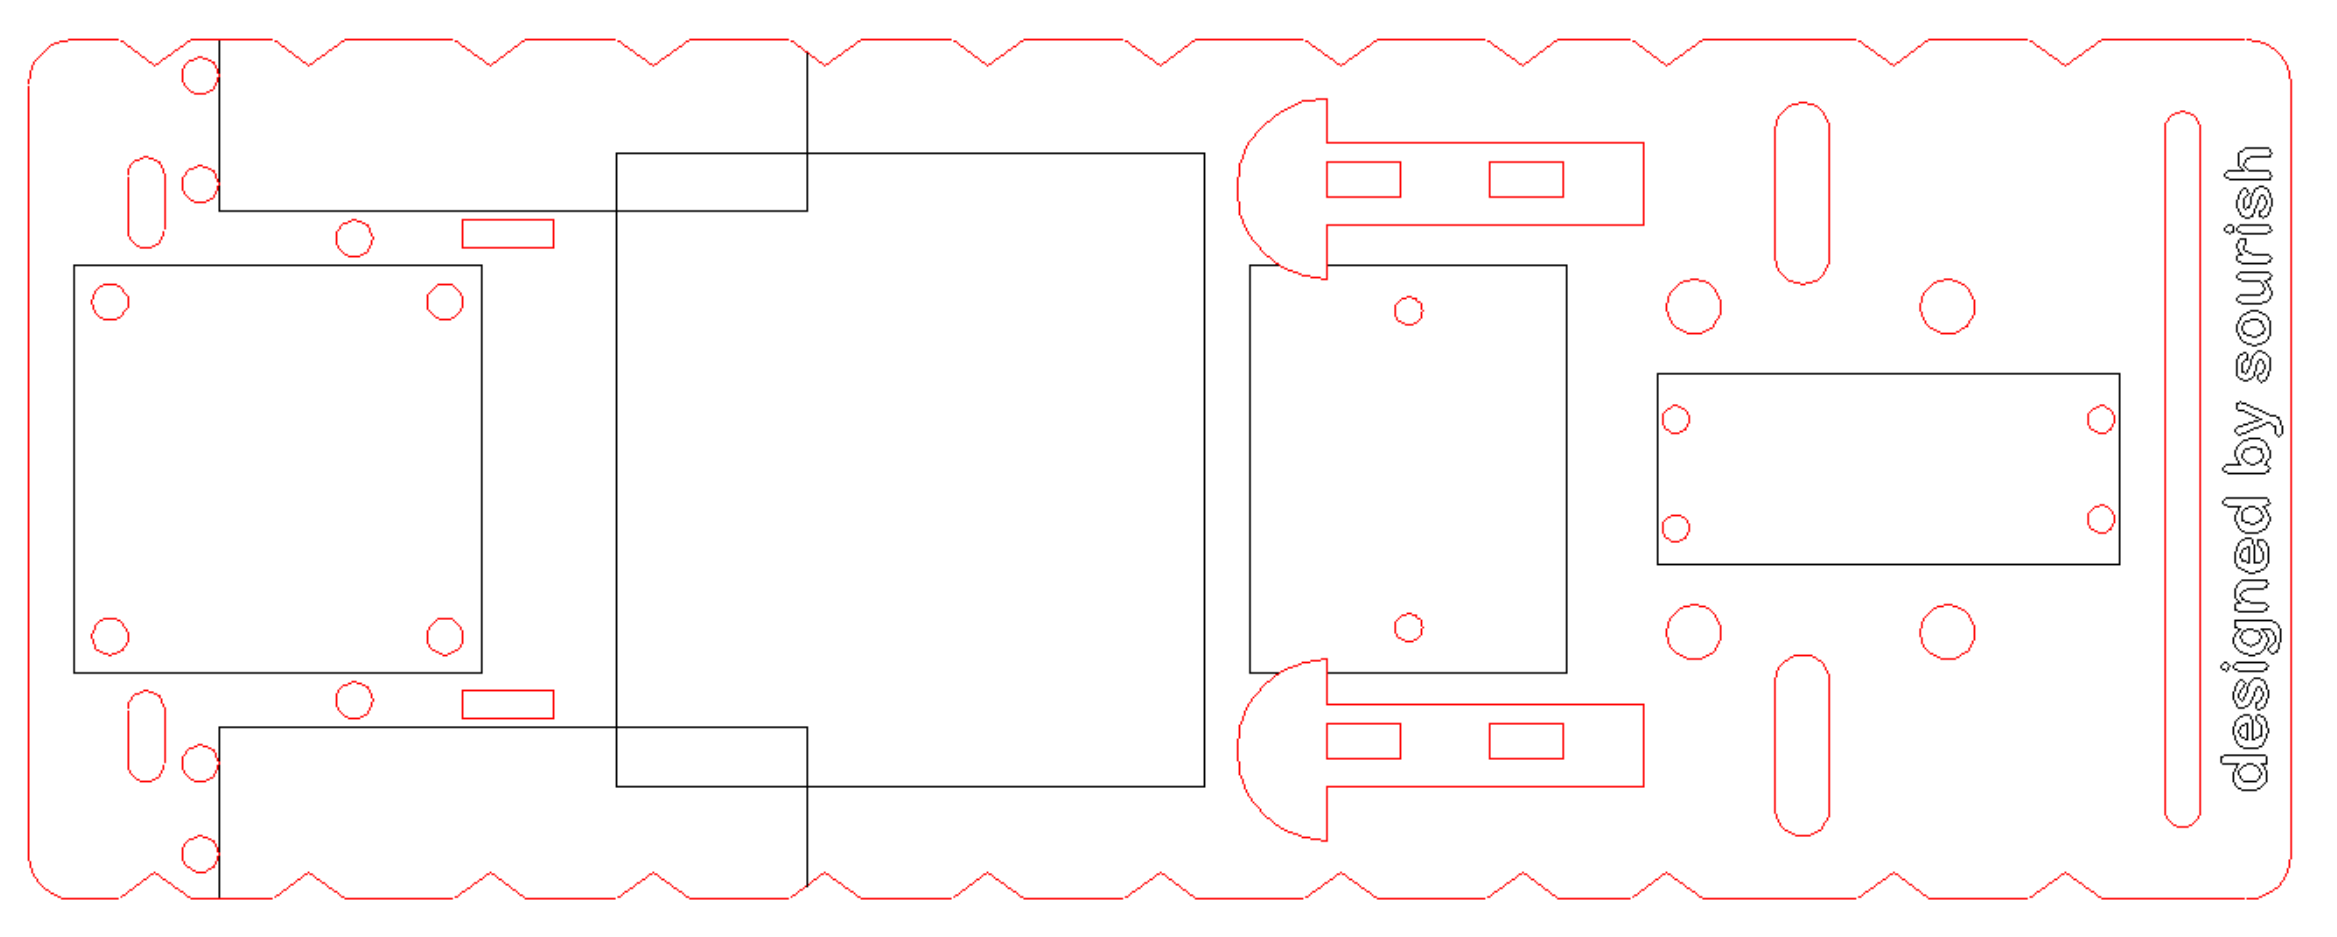
A midnight CAD drawing - comparing it to the resulting robot above could help visualise the design.
You can see the location of each key component marked with the etched black lines. The various holes are intended for screwing the components, organising the wires, or using zip ties (an engineer's favourite tool). The triangular grooves on the long sides allow for rubber bands to be securely used, if needed for additional support. The red mushroom-shaped cutouts are for attaching the motor. The long bar cut near the front allows the IR sensors to be positioned at varying distances from each other.
That's pretty much it. After laser cutting it, we found a small mistake in the design and hastily fixed it. Then, it was a matter of using a load of screws and wiring everything together. Done!
The chassis was uniquely long (which brought a unique set of challenges when it came to programming, but could be leveraged using the right algorithms) yet it worked remarkably well and didn't need any re-designs throughout the year. Now for the electronics!
Here's a quick rundown of the idea:
- The IR sensors at the front would detect lines. The black tape on the white paper would be less reflective and thus trigger a different reading. The width of the tape was a little bigger than the width of an IR sensor. 3 sensors leads to 8 combinations of patterns for the robot to detect, the majority of which would be various junctions.
- The RPi Pico would process this data and decide what to do next; path correcting, turning, computation etc.
- The Pico would send the signal to the motors (via the motor driver board at the back).
- The Pico and the motor board would both take 6V from the battery pack, whilst the low-powered IR sensors would take juice from the 3V output of the Pico.
- The wiring is all broken out onto the mini breadboard.
Now that the robot was built, the first step was to get the robot to follow a straight line. We had considered this to be quite trivial, just use the 3 IR sensors at the front of the buggy and ensure that the central sensor is always over the line. Easy, right?
We quickly found that the buggy strayed off from the line very often, as the (worryingly low quality) motors ran at different speeds. At first we tried out PWM control, reducing the speed of the faster motor. In truth, other than causing some very loud buzzing, this had no real effect! It was probably as we were using 6V as opposed to 12V, so the range of PWM control was severely limited from around 60% to 100% power.
This was a big issue for the teams, especially as we branded this as the "easy" part! There were loads of approaches to solving this problem, all of which hinged upon the same idea.
Use short, jittery movements. Turning the motors on for a brief period and then waiting for the IR sensor inputs before making another brief movement worked quite effectively. There was a balance of speed and reliability to strike here. The reason this method worked is because the IR sensors (also being a low quality component) had a measurable lag between a change in environment, and an output to the Pico. So keeping the motors running continuously would cause the buggy to stray too far off the line before the IR sensor, and therefore the Pico, could respond.
Once that key insight was discovered, further optimisations could be creatively applied to increase the speed whilst maintaining a high level of reliability. We both implemented our own ideas into our respective robots:
- Sourish - I decided to space the IR sensors out as much as possible. This meant my robot could go much quicker and, whilst it would go off the line by a lot, the IR sensors would always catch it and the robot would quickly swerve back into position, again roughly aligning itself to the centre.
- Dom - I put the 3 IR sensors perfectly adjacent to themselves, and had a "line-hugging" algorithm, where the robot would carefully position the line almost between 2 IR sensors. However, the robot travelled at an angle to the tape which would cause issues later down the line...
We also tried learning about other techniques used by researchers and hobbyists online - it seemed like PID was a critical feature for a good line-follower, but PID wouldn't really work with just the 3 IR sensors in their planar configuration since there was not much 'weighting' that could be done.
At this point we had exhausted much of the first term and the reality that this would be a very difficult project began to hit us. As we tried to offer support to the teams, we moved on to cornering at around Christmas time. Once again, in principle, in our (very naïve) planning phase turning a corner is simple. When a corner is reached, the middle and left/right sensor (depending on the junction type) would be activated. If this happened, simply move the buggy forwards and right/left.
This, of course, was far too trivial to work.
The robots struggled to not only detect the junction accurately, but also turn reliably. The first issue was a result of the robots not perfectly following a line. Whilst both of our methods above worked to move in an overall straight line, Sourish's would mean the central IR sensor was rarely over the line (and so could not detect junctions), and Dom's angled approach worked perfectly for right-turns, but never read a left-turn. The central IR sensor was never really over the tape with Dom's method, so junction detection failed if the turn was opposite to the side the buggy was 'hugging'.
So, the solution?
To revisit our straight-line code and improve it! We all took very different paths to try and resolve this. After working tirelessly, Dom had a really nice idea. The robot would 'measure' the tape line width such that it knew how much to correct itself. So when the robot realises it is off the line, instead of correcting until it's back on the line, it would keep turning until it was over the centre of the line!
This worked so well because, otherwise, the robot would likely just accelerate back off the line right after correcting. This solution delayed that occurring, so the buggy spent more time accurately aligned.
start = time()
count = 0

while True:
    read()
    count += 1
    right()
    sleep(0.03)
    pause()
    sleep(0.05)

    if val2 == 0:
    	break
    if count >= 300:
    	break

end = time()
TIME_FROM_RIGHT = end - start - (count * 0.05)
The code snippet above implements the first part of this idea - 'measuring' the line width. Initially, the code lines up the central sensor to be just on the left edge of the line. It then jitters to the right in lots of small increments until it reaches the right edge. The time taken to do this is halved. So next time the sensors stray off the line, the robot moves back until the central sensor is over the tape, and moves TIME_FROM_RIGHT seconds further inwards.
This was just one approach to solve the problem, and it was incredible to see that the 3 teams all found their own solutions. We only needed to help them with optimisation to squeeze as much reliability as possible.
Once the robots could follow a straight line very well, turning 90 degree corners became a little easier. Teams used similar approaches here. They could either 'line hug' (which was quite slow), or move forward briefly, before swinging right about 60 degrees and then making small adjustments until the robot re-centred.
Sourish had a hyper-optimised version of this second technique, where the robot would slightly overshoot and then correct backwards. Combined with his centering algorithm, which had a 'memory' of which way (relative to the line) the robot last left the tape, the buggy was pretty rapid at cornering and line following. To see our full code, check out our GitHub repo.
Oh, and to determine the junction type, the robot would first realise it's at a junction, then move forward a little to detect what is ahead of it, before coming back. This is where our long robots struggled as a slight disparity with the motors would cause the IR sensors to become off-angle to the tape.
The robots all had their own ways of traversing various line configurations. It was almost as if each robot had its own distinct personality! It was quite cool to see how each one tackled an issue and discuss the best approaches and optimisations with the teams - we just loved collaborating with them and seeing everyone make progress by pinging ideas off each other.
The final step left was the maze-solving algorithm itself. We initially intended to have something like Djikstra's or a BFS, before eventually realising that wouldn't work very well for numerous reasons. The next idea was to then do a 'recon' run of the maze using a left/right-hand turn rule, storing the turns taken. You could then use a clever reduction algorithm to get rid of dead-ends and find the faster path. But we soon discovered that dead-ends would cause a huge amount of issues and there wasn't enough time to find an accessible solution. So we settled on everyone just using some simple right/left-hand rules. The competition was difficult enough already!
Of course, if a team did manage to find a smart algorithm, they'd be rewarded with a faster route.
Anyway, with the technical details covered, it's time to see how the teams were really getting on!
Lent Term Highlights
After the first couple of weeks, it became clear that teams needed extra support on a few key areas. So we threw together some resources for them:
- Creating a base - this help sheet gave the teams ideas, inspiration, and advice on making a chassis for their robot.
- Circuity and wiring - this document was an introduction to wiring the Pico, components, and using the breadboard.
- Motor board - motor driver boards are confusing components for beginners, so we created a whole page telling the teams how it works and how to safely use it.
There seemed to be lots of confusion around what the project actually was, so we created a doc to clarify the competition, rules, and rough format. Adapting quickly to satisfy what the Year 9s needed was a pretty vital component!
Oh, and a month or two in, everyone was confused about how to wire the full circuit. The idea was that we'd give the teams enough resources to get them started and give them a direction, with the rest left up to them to figure out. We wanted to encourage the idea of self-learning, Googling, and independence. This ended up not being the best idea, and we eventually just gave teams a full circuit diagram as they all got too confused.
You can check out our resources here!
With the first, busy, term done we were glad to see things settle down a bit in the Lent term. We had a strict requirement that by this stage all remaining teams had to have built a buggy that could follow a straight line, which (after some chase-up emails) whittled down the competition to just 3 remaining teams. With the drop-in sessions still ticking along nicely, slow but steady progress was made by all.
In the middle of all of this, we were both requested to feature in a promo film for the school's Computer Science department. This was an amazing opportunity to show off all of the cool stuff we were doing, so of course we jumped at the opportunity. We mainly discussed the AstroPi competition, but lots of our Year 9s also came along to show off their buggies so far. You can check out the whole video here (including interviews of us!) to see what progress had been made on the robots.
As the teams were becoming a little more independent, drop-ins were less busy, so we had some time to reach out to local tech companies and organise a fun trip for the remaining 8 pupils. This was mainly aimed to keep up motivation (and allow Sourish to miss some lesson time). To be honest, we were worried that some teams may pull out as it became clear that the challenge was much harder than we initially thought, so a trip would be really important to maintain interest.
Despite that, we still had no luck! We did receive the occasional response but nothing concrete materialised. With the competition day now just weeks away, we had to park the idea for the time being as we started to focus on how the competition would actually be run, and hastily bought some more matte black tape. Oh and of course there was a huge rush for progress as teams realised how soon they would be testing out their creations…
The Competition
And so the big day finally arrived! After some tinkering around with projectors and music, the atmosphere was set for a great hour to show off teams' creations. Whilst Sourish busily materialised our pre-designed maze, the teams continued working on their final (slightly panicked) preparations.
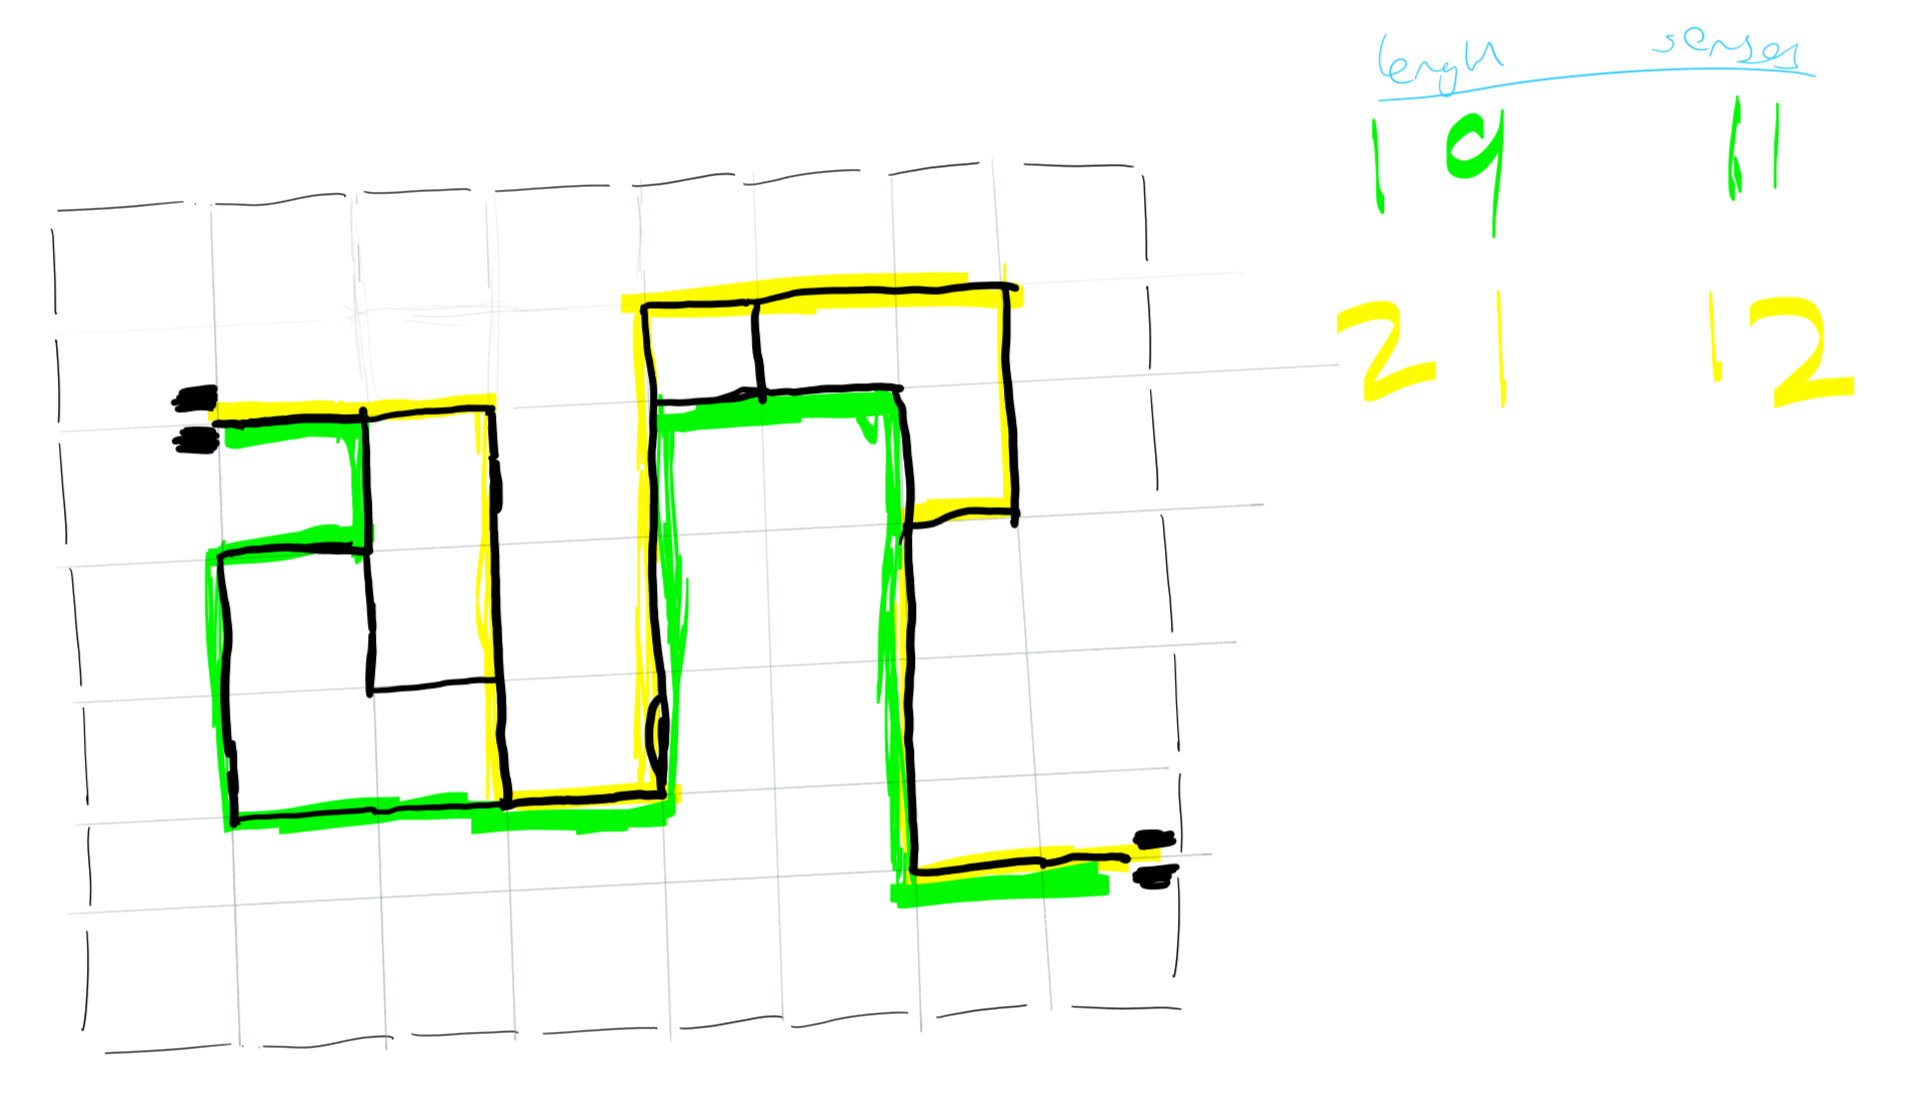
A sketch of our maze design. The black lines represent the maze itself, the yellow route is a "left-hand-turn" algorithm, whilst the green route is a "right-hand-turn" algorithm. The length and number of intersections of each route are shown. Lots of thought went into crafting the best design we could!
The idea was to have a fairly simple maze; teams were worried about needing sufficient room to turn without any other lines being in the turning radius which would cause confusion. We did, of course, include a couple of sneaky paths. If the teams used a more advanced algorithm than the green or yellow routes, they'd be able to get a much faster time with a length of just 17 units.
We designed a grid-based system from which we could easily reproduce the maze with standardised lengths (each unit is 30cm) according to the sketch above. Something to notice is that the green route is notably faster - so hopefully the teams would have programmed in both routes so that they could finish the maze with a better time. Of course, this depended on the teams reaching the end…
A crowd of spectators started to form as buggy wheels finally began to move on the maze, and it was great to see some initial progress being made. Generally, the buggies were very reliable at turning corners and teams ended up making around 6-7 corners each run. However, we had done limited testing on a full maze so none of the teams were fully prepared to encounter loops. In fact, all of the teams just took any corner they saw, causing them to go round in circles!
In the end, nobody reached the end but every group made a great effort and had clearly achieved their goal of a reliable line-following buggy. In hindsight, we should have given more testing opportunities as much of the issues encountered on the day were easily solvable.
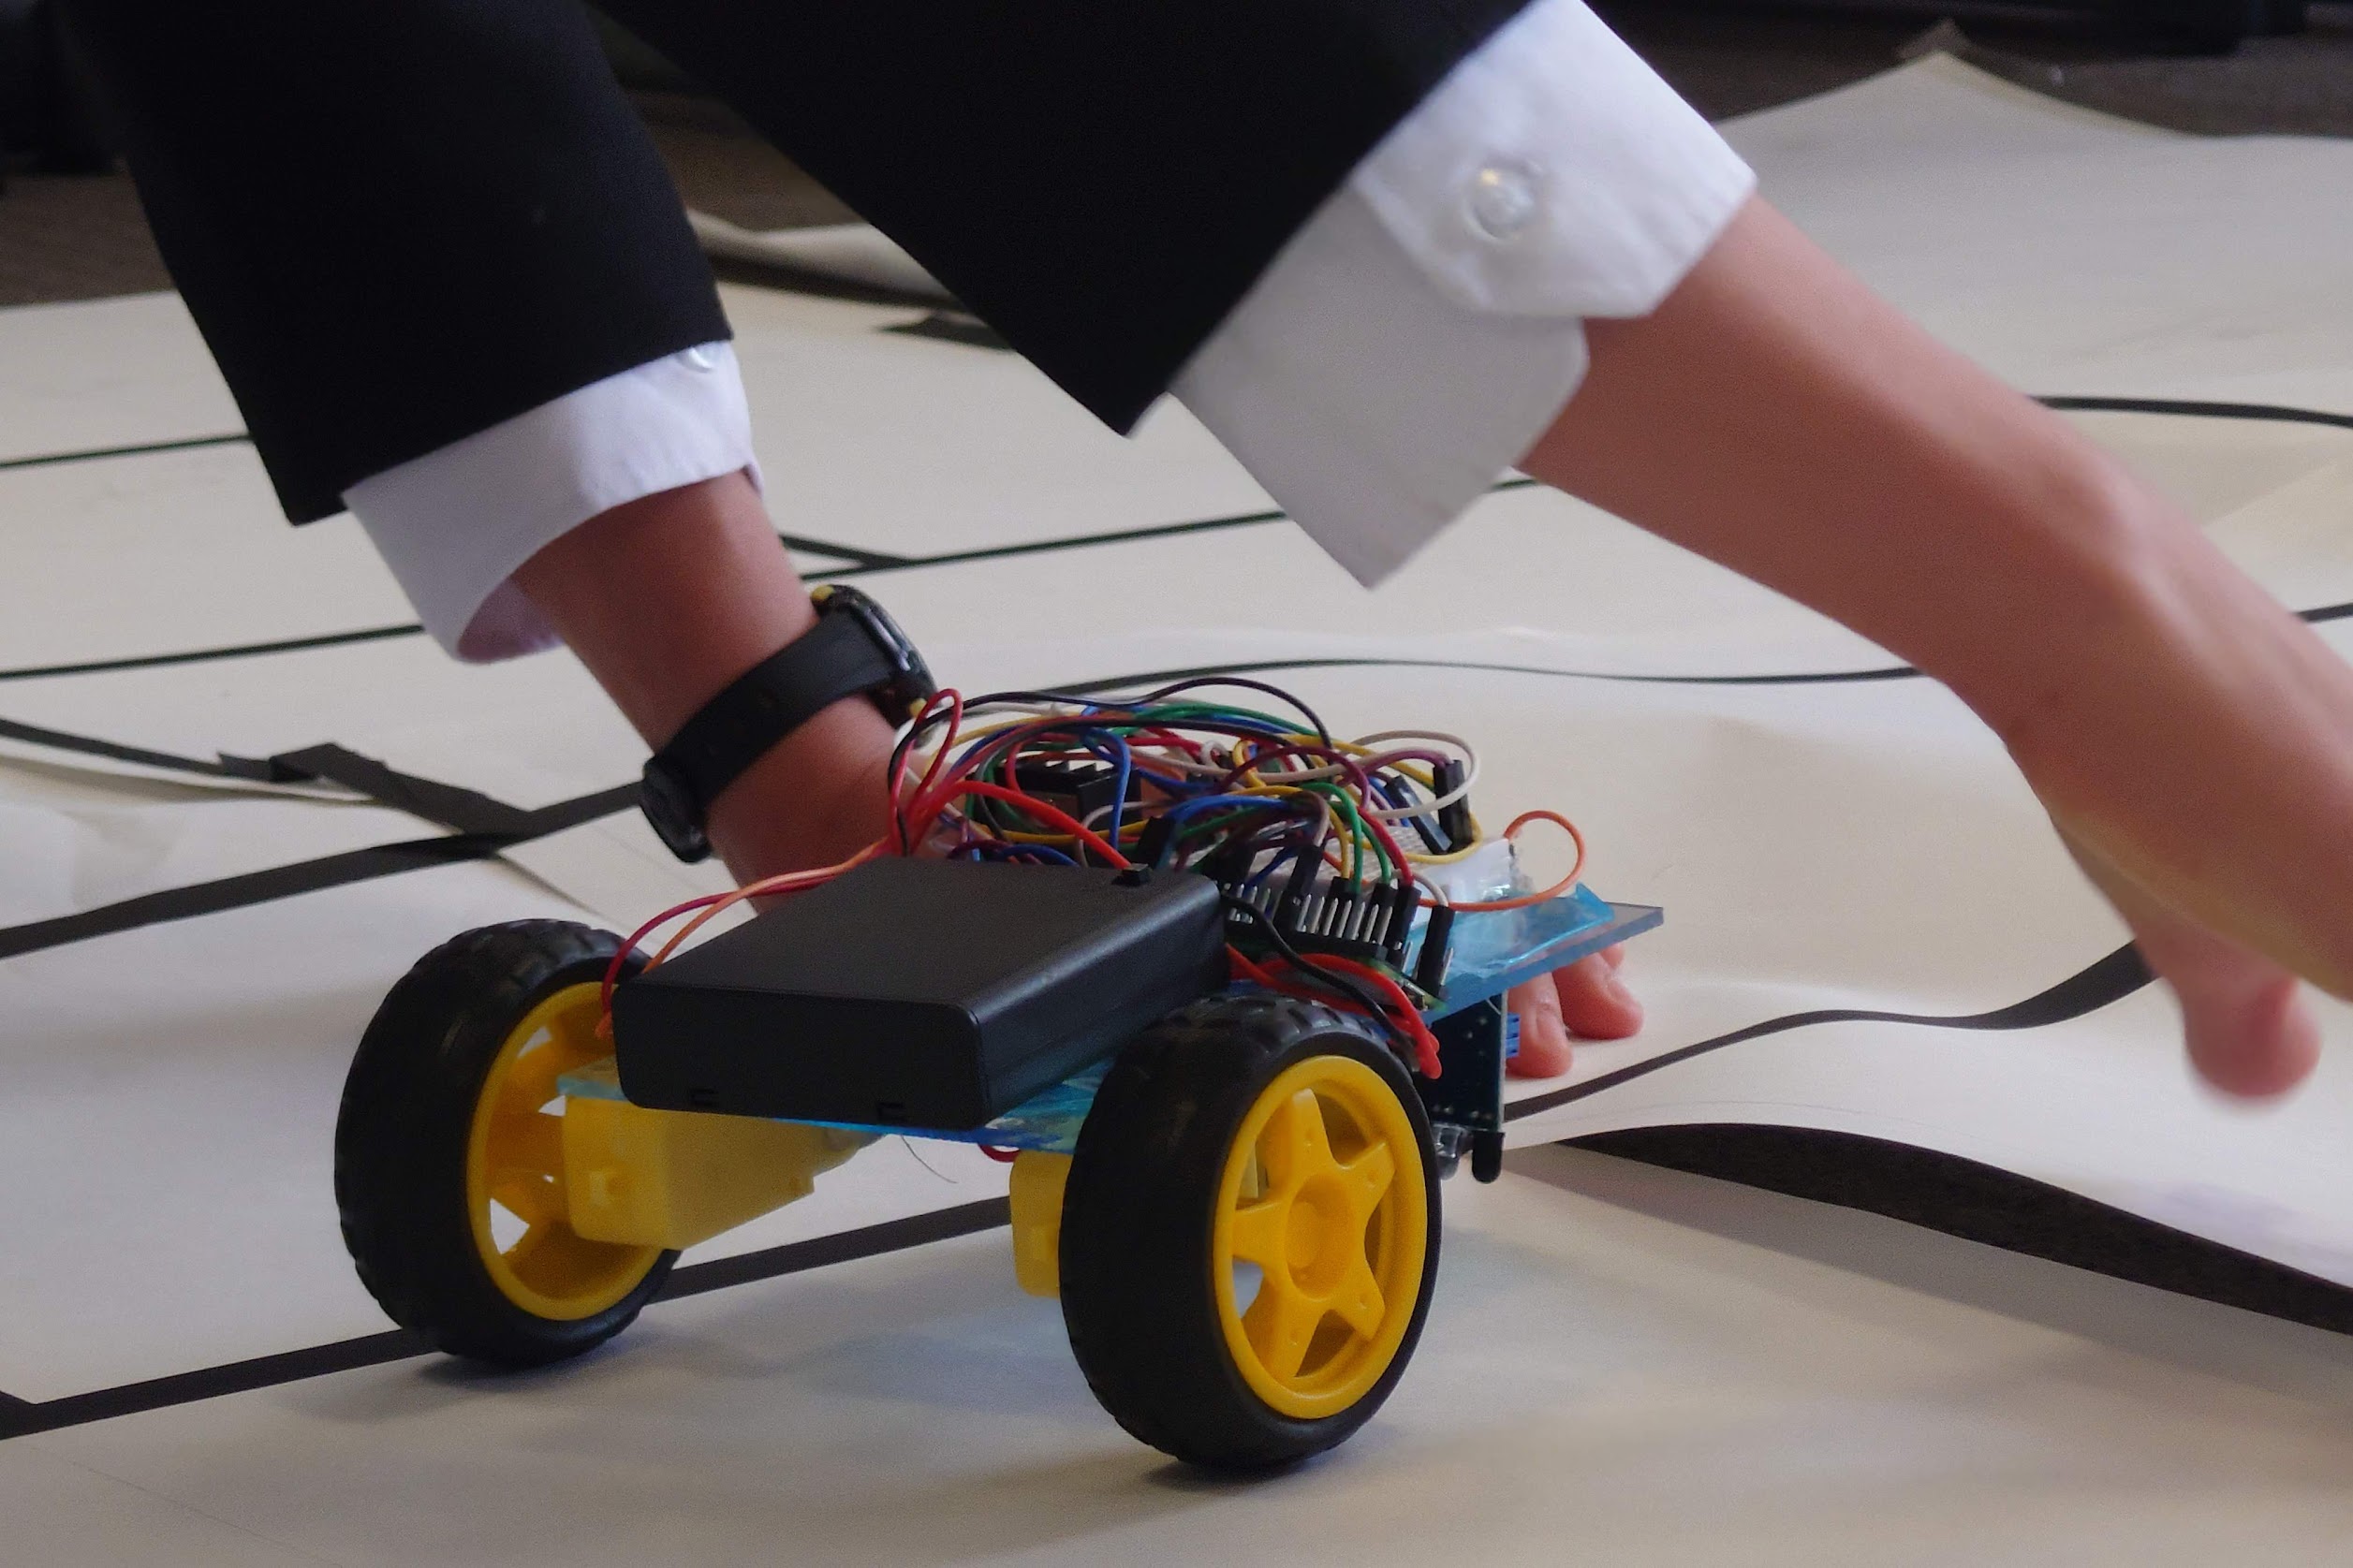
One dedicated team-member came back the following week with debugged code and reached the end in just a few minutes!
To determine a winner, we allocated points based on the following:
- The maze itself, who got the furthest?
- Build, how nicely was the robot put together?
- Solution design, how well was the code written, and how reliable was the robot?
We wanted to make sure that not everything came down to the maze. The whole point was to test their creativity and holistic performance, so teaching skills such as laser cutting to produce a base was just as important as how far their buggy reached! After Sourish, Dom and our teacher supervisor had given their scores, the winner (GTEM) was crowned and screeches of joy were heard!
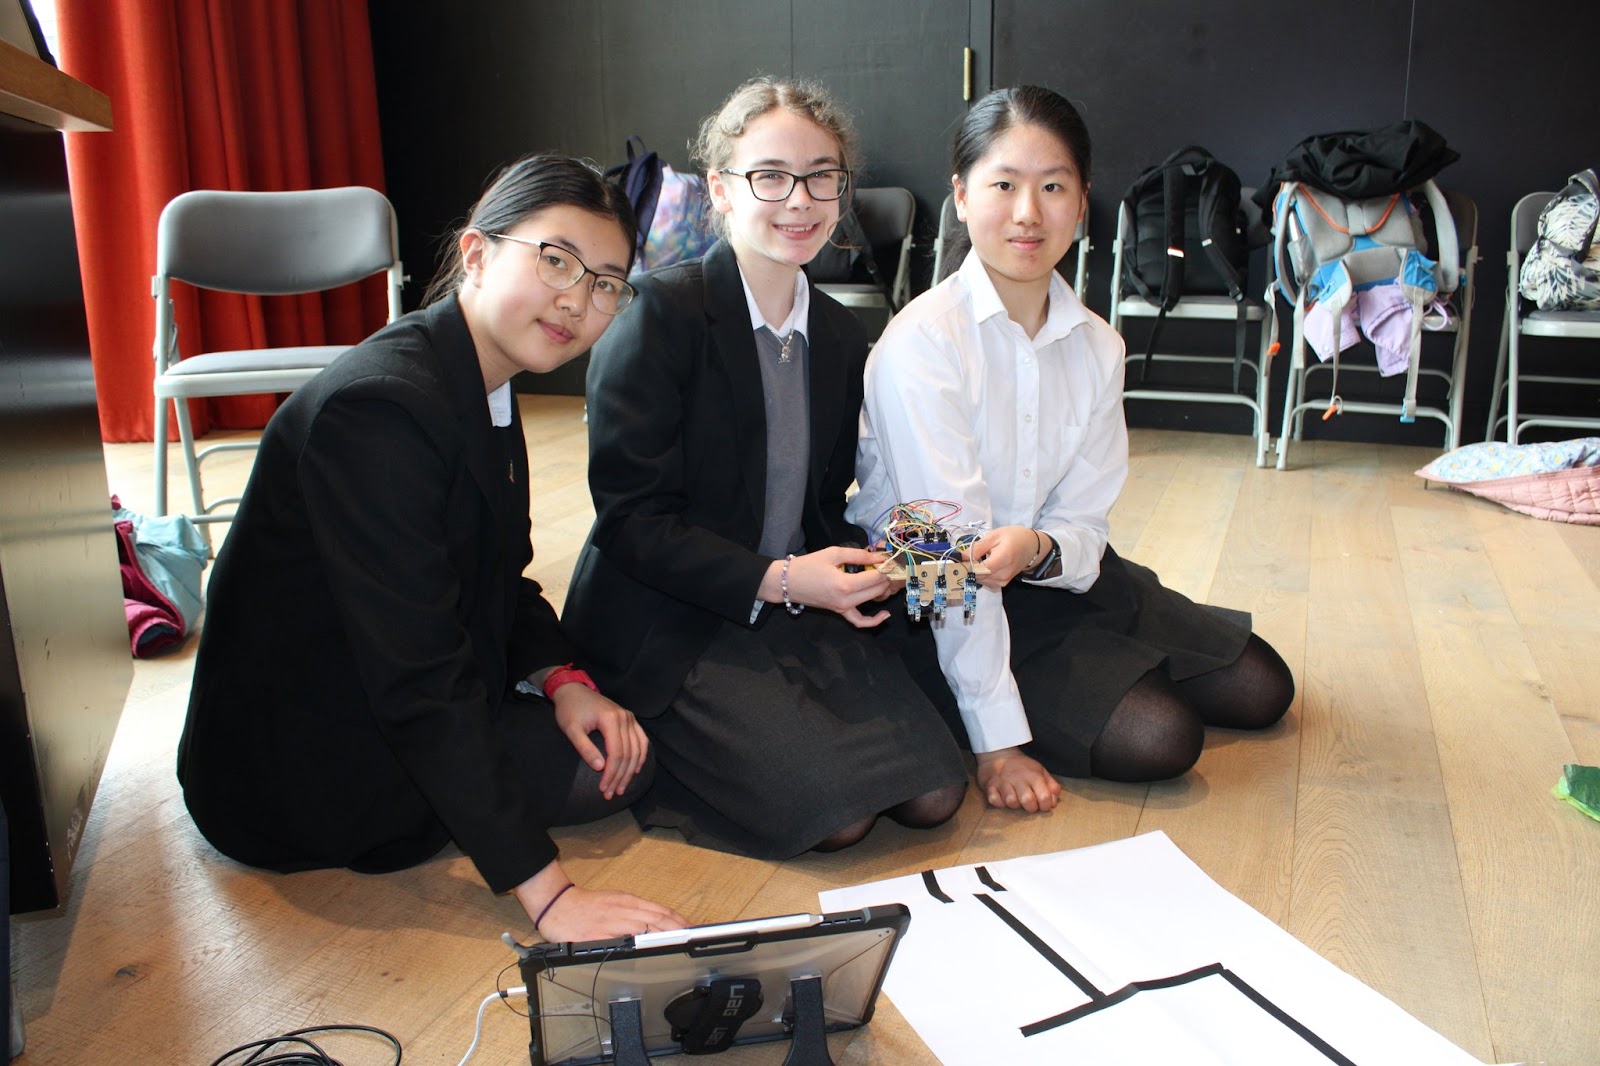
Team GTEM, an hour before they knew they won!
We wrote certificates, and awarded them with cash prizes the next week. You can see the final scoresheet here. The scores from each us vary quite a lot, as we were all looking for subtly different things!
The first place certificate.
It was great to see how much fun everyone had that day, as well as appreciate the progress that all of the teams made over the course of 8 months. It gave them (and us!) a really good flavour of engineering in the real world. The 3 teams stuck with the challenge throughout the year, showing immense perseverance and independence.
One group even revealed that they now planned to take AS Computer Science a year early! It was clear that the competition provided huge value and a positive impact to all those taking part. The hard work put into Competition Day resulted in an experience never to forget.
A Play-around at Pi
After a whole year of challenging robotics, we thought we'd all earned some sort of reward. Despite our fruitless attempts to organise a school trip back in Lent, we were pretty adamant that we'd get something!
As Sourish had been volunteering at the Raspberry Pi Foundation HQ (RPi HQ) CoderDojo for a few months now, he thought it would be a cool place to take the teams. After a quick chat with RPi's Mark Calleja (he's a legend), we managed to secure a trip! Some admin work and back-and-forth later, and a plan was in place to visit RPi HQ for a couple of hours one afternoon.
The teams (and us) were all super excited :)
On the day, Mister C greeted and introduced us to the makerspace they had. He gave us a lovely tour of the building, which included a deserted office (work from home is now more popular - especially on Mondays), a mini filming studio, the break room (where we devoured some leftover Dominos and sweets), and another random room. He also let us choose some books to take home - all sorts of Python and RPi project tutorials.
He talked to us about the working environment there and how everyone is given time to learn all about RPis and use them first hand - Mister C took this time to make a talking traffic light that told people to go away when they came to him with annoying questions! He additionally mentioned how taking lots of breaks and having fun time is crucial. We thought this modern approach to working was epic and it clearly made everyone there happier.
Anyway, for the bulk of the time there, we played around with RPi 4s, Sense HATs, and Coral accelerators. Sourish was delighted to finally use a Coral amid the chip shortages, whilst Dom was bashing away at a game of snake on the Sense HAT. We supported the teams as they worked on their own things, making full use of the gear we were given.
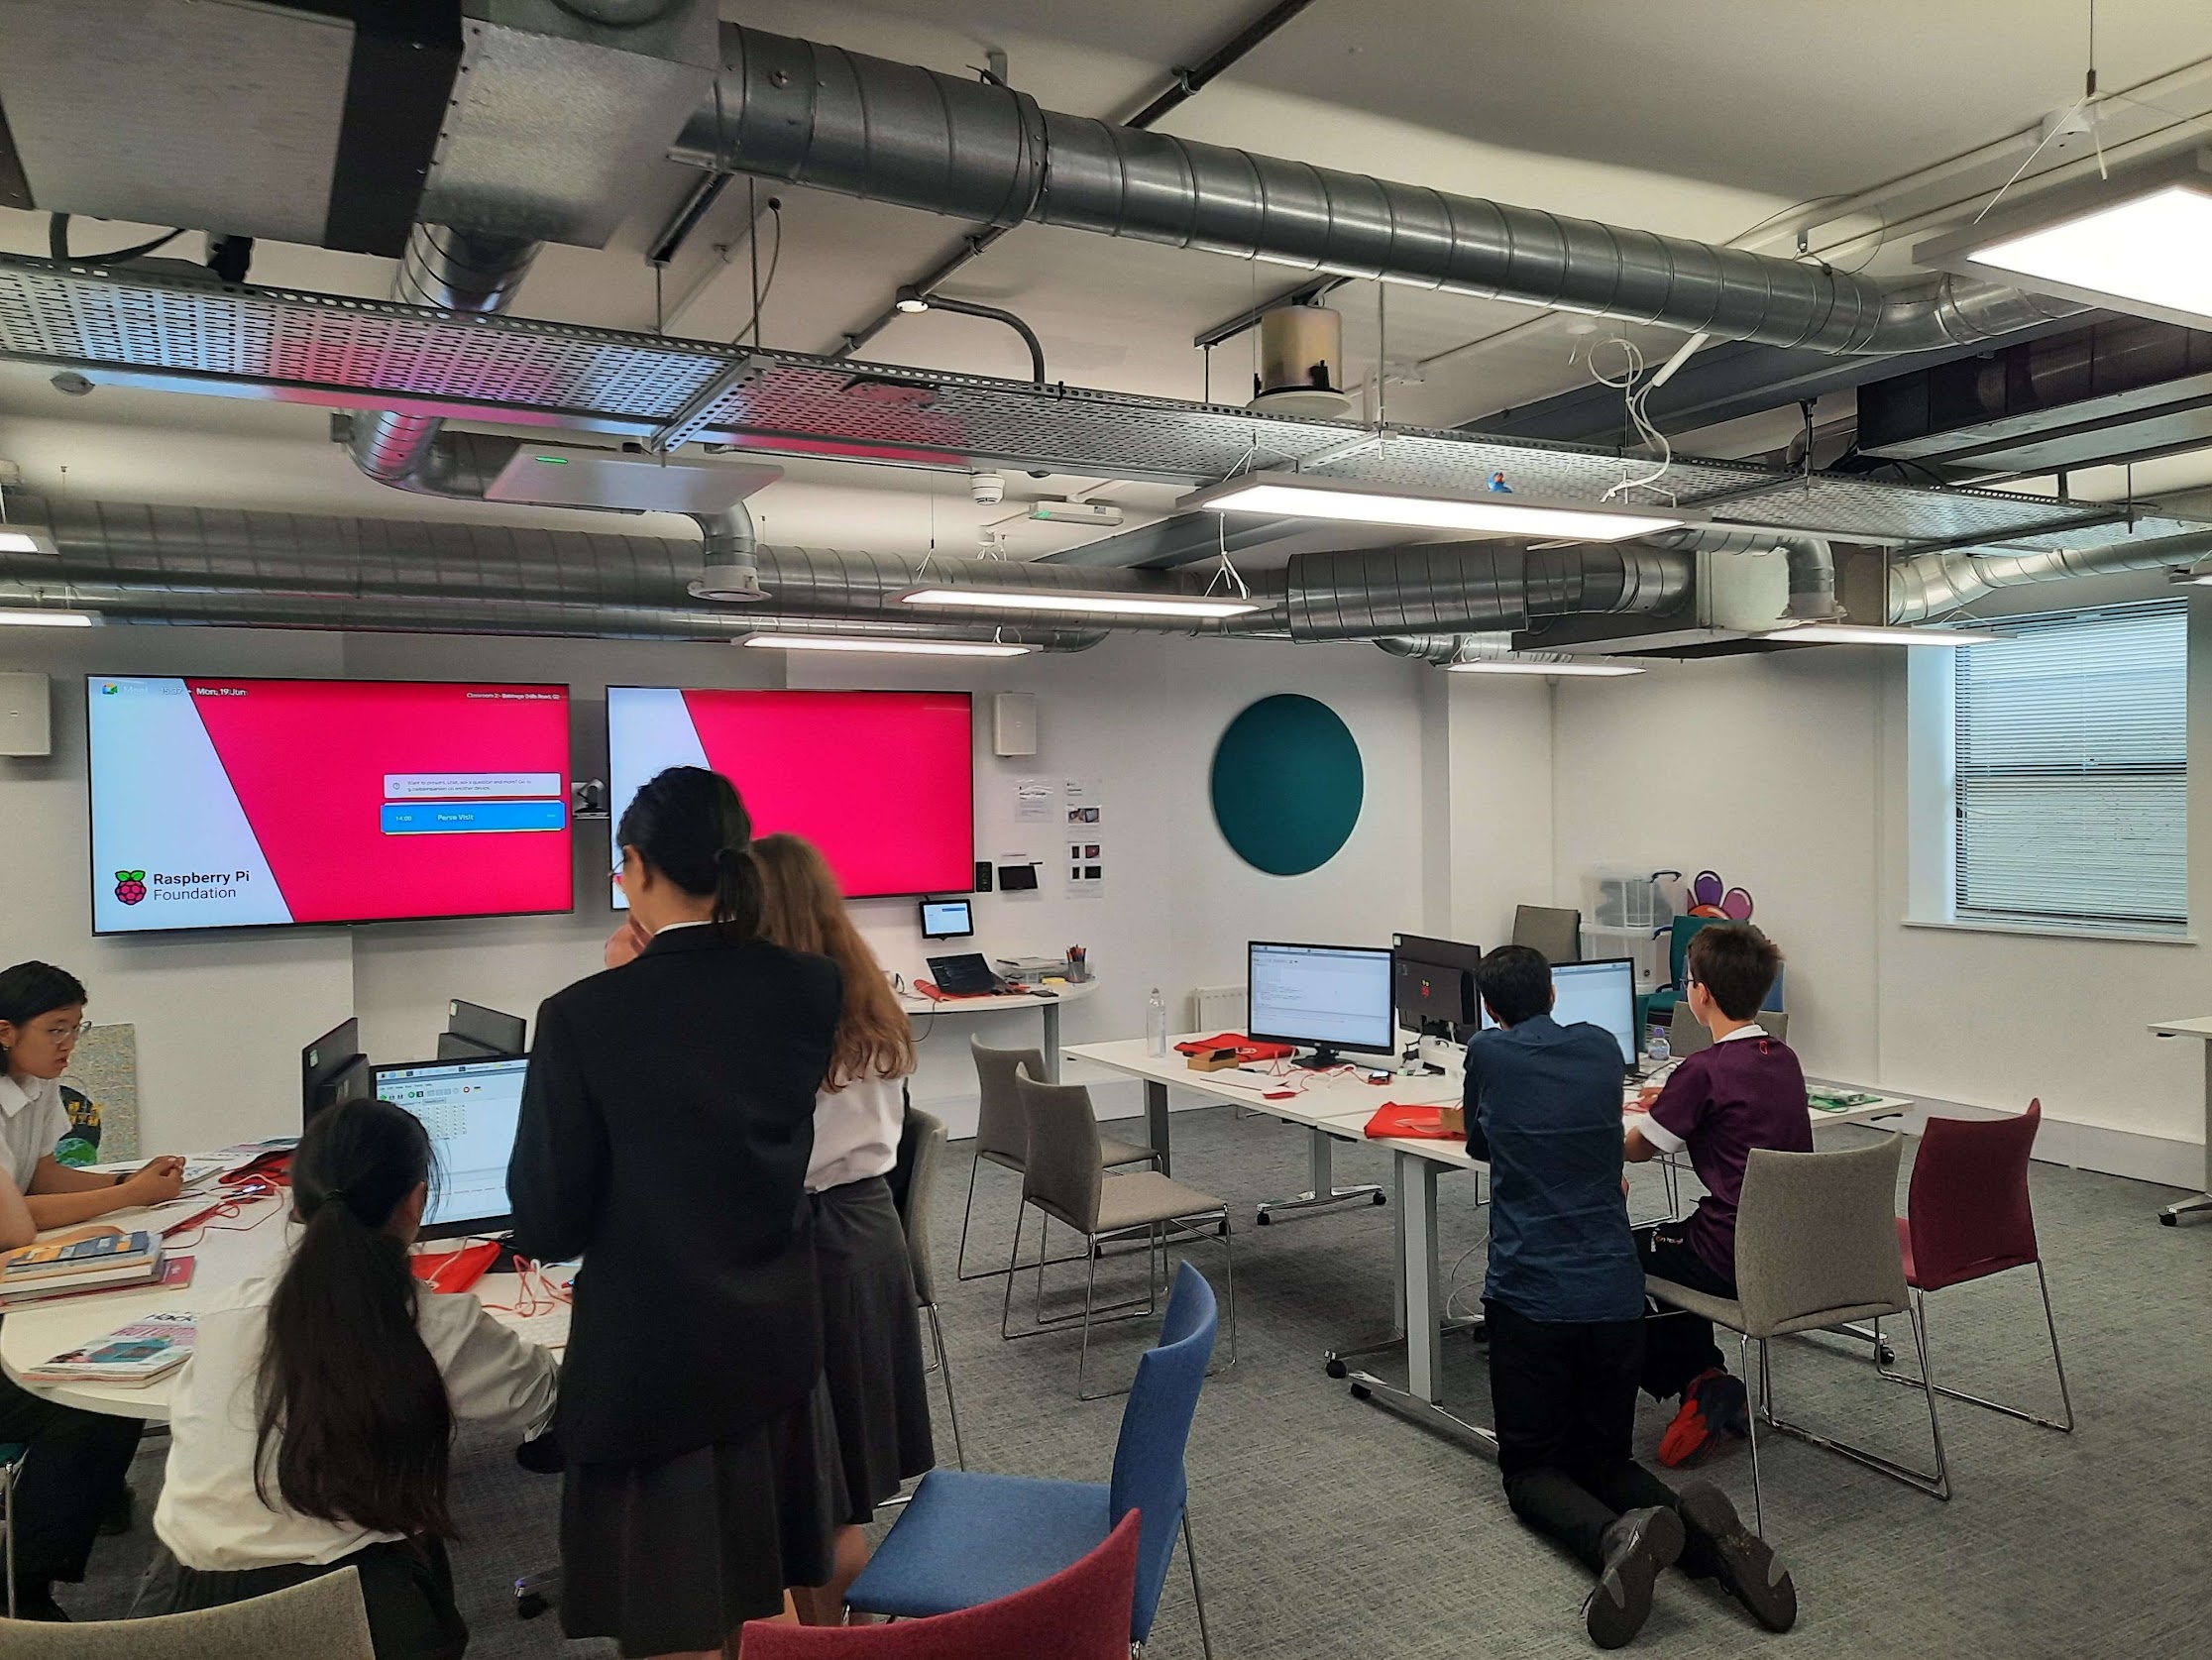
Everyone messing around with cool components!
Mister C helped us out, gave us cool demos of all sorts of projects, showed us some insane ChatGPT hacks (he seemed to spend all his time finding ways to get ChatGPT to do useful things), and made our time there memorable. He was full of energy and fun - impressive considering it was a Monday afternoon! The teams learned loads on the trip, and lots of cool conversations took place; it was incredible for all of us.
It was really nice to see the space, and an especially awesome opportunity for the young teams to have their first insight into the industry being such a great and inspiring experience!
Wrapping Up
From the first email outlining competition ideas to the trip that concluded a year of hard work, persistence, grit, success, failure, learning, and laughter, the whole thing was a blast for us. We taught the teams so much whilst working on our own buggies, developing our robotics skills and passing them down to younger pupils. We designed resources and presented to a room packed with over 30 excited 13-year olds (which made us appreciate the talent of our own teachers), organised competition day, a school trip, and worked on the economical and technical side of the challenge. Bonds were formed and memories were created - it was a roller coaster ride with as many downs as ups, but we're glad we took on the challenge.
There are, of course, plenty of things we learned from this year that could have gone better. The end goal itself was too challenging; we didn't test things early enough; we didn't provide enough initial support; we struggled to teach; and competition day was chaotic.
But, moving forward, we're flipping all of these negatives and strive to work on them for next year, when we run a similar competition but with bigger hopes. We've already started planning it and it should be even more awesome as we transition the club towards a new set of passionate roboticists. We're extremely excited to see how it'll turn out!
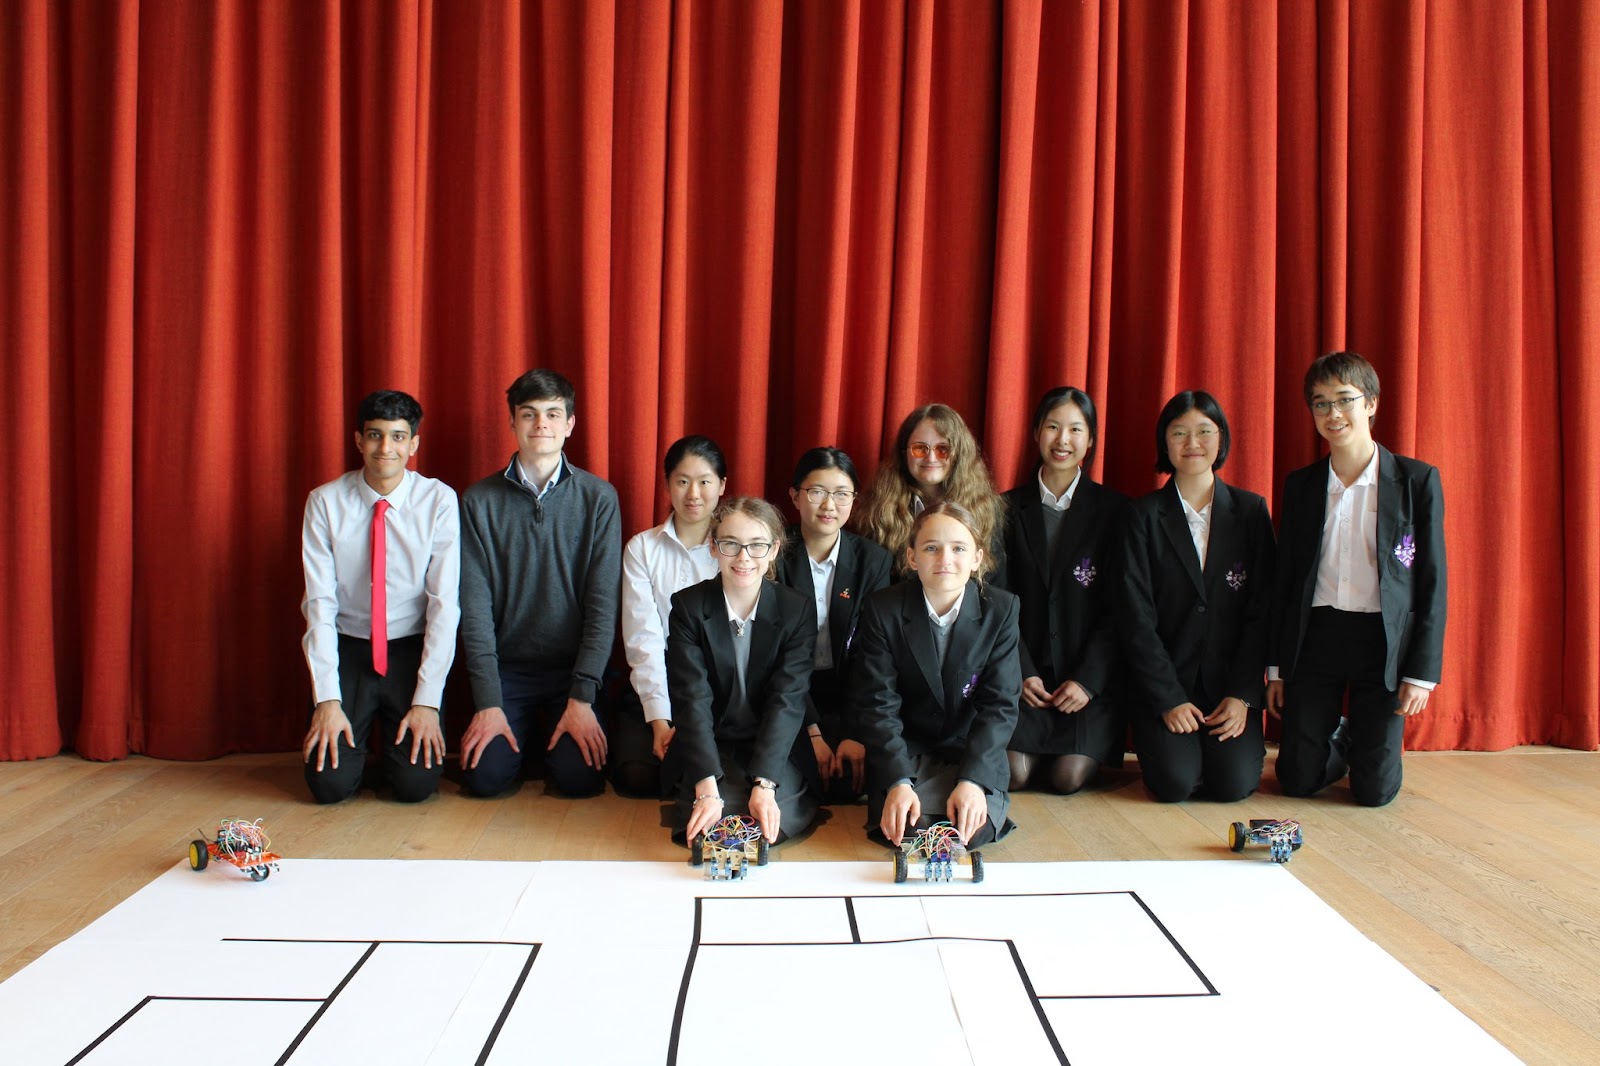
Competition Day! A huge well done to all 8 finalists, we know everyone involved found the experience valuable.
Thank you for reading - we hope you enjoyed it as much as we loved writing it :) Feel free to reach out if you want to ask anything! And a massive thanks to Mr Baker, the teacher that made everything possible - people like him inspire people like us.
copied!
failed to copy!