Work Experience Account (Pt. 3) - Leonardo
17 min read
August 8, 2023
Leonardo are primarily a defence company, with most of their work being in aircraft and helicopter systems. They have 7 sites across the UK and I spent a week at the Luton one, staying in London for a shorter commute. It was their electronic warfare division - so the work done there aligned pretty well with what I hope to be doing in the future! I was excited to see what they had in store for me...
Day 1
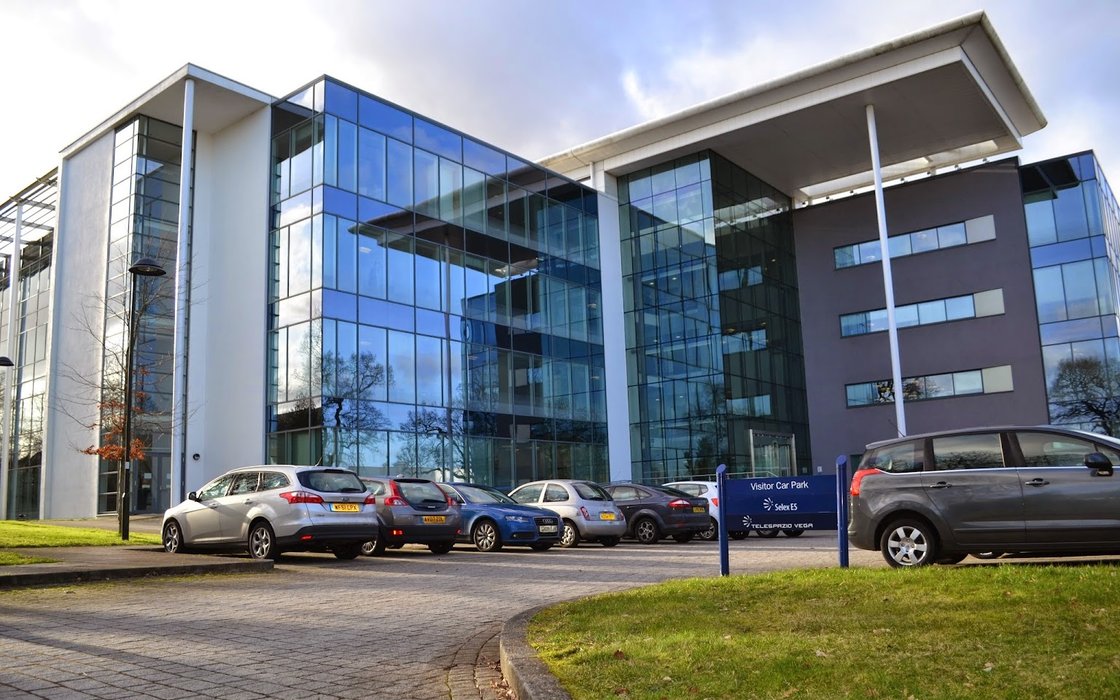
After a short but hilly walk, I reached their office. It was in a nice business park with excellent infrastructure and plenty of greenery. Admiring the sleek interior design, I received my visitor pass from the super nice receptionist and met the other students. There were 7 of us, all interested in electronics, mechanical, or aerospace engineering.
We headed to our room for the week, did introductions, and got a rundown of what Leonardo do. Electronic warfare is essentially anything in the electromagnetic spectrum - radar systems, communications, jamming, aircraft automation, etc. We also discussed stealth shapes. These are aircraft designed with passive stealth technology which reflects incoming radar all over the place due to their shape - a good example is the B-2 Spirit. Expendables such as chaffs or flares can be useful against certain types of missiles, as a last resort.
Then, we got a quick tour of their timeline wall of warfare technology before looking at some of the displayed objects. They had quite a few decoys on show, including the latest BriteCloud.
On another note, the amount of security required to get into a Leonardo laptop is absurd. You've first gotta enter the Bitlocker key to decrypt the drive. Then there's an RSA security key (with a hardware authenticator). And only then is there the username/password field. I'm sure you can imagine that this caused plenty of issues!
Anyway, so the first session of the week was on systems engineering. Our hosts told us about their job, and the interdisciplinary nature of it. We looked at how to create clear requirements so that anyone reading them would all interpret them the same way - communication is pretty important in engineering. The Mars Climate Orbiter is a legendary example of poor communication where different teams used different units of measurement and it lead to a $200 million disaster!
We looked at the V-model, which is a framework showing the development lifecycle of a project from a systems engineer's perspective. Following the diagram, we created a paper aeroplane to a set of requirements and tested it. It was a really nice way to demonstrate the overall theme of systems engineering.
The V-model. The apprentices complained that their manager always gave them lectures on using it!
Lunchtime! I had some really nice cheesy pasta with salad and cake. The prices for each item of lunch were quite funky - it felt as if they were being decided every Sunday by an AI model.
The afternoon session was all about electronics. We were introduced to our project for the week, a proximity sensor, and looked at the theory behind it. We took a deep dive on each component involved, including the OpAmp. An operational amplifier is a very powerful and common component. It essentially takes two inputs and outputs the difference between them. But this output signal is amplified, making it much larger than it actually is. The energy to do this comes from the source voltage, which is also sent to the OpAmp.
In the case of our circuit, we're using the OpAmp as a buffer and a comparator. Wait, lemme go back a second and describe what the circuit actually does.
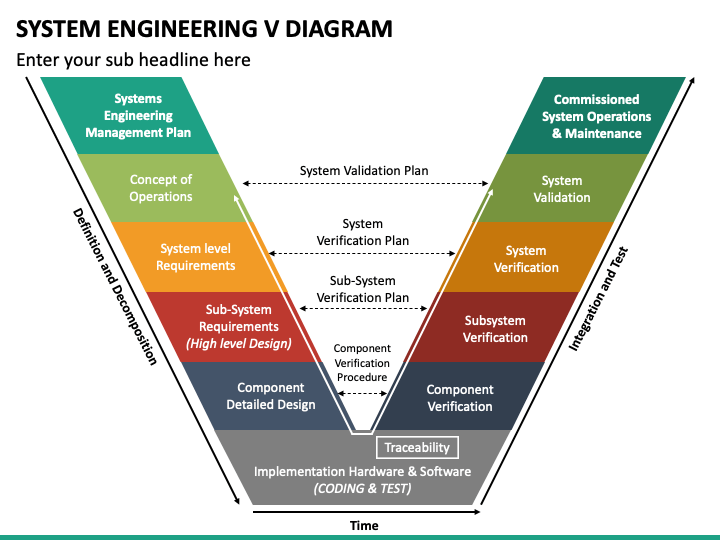
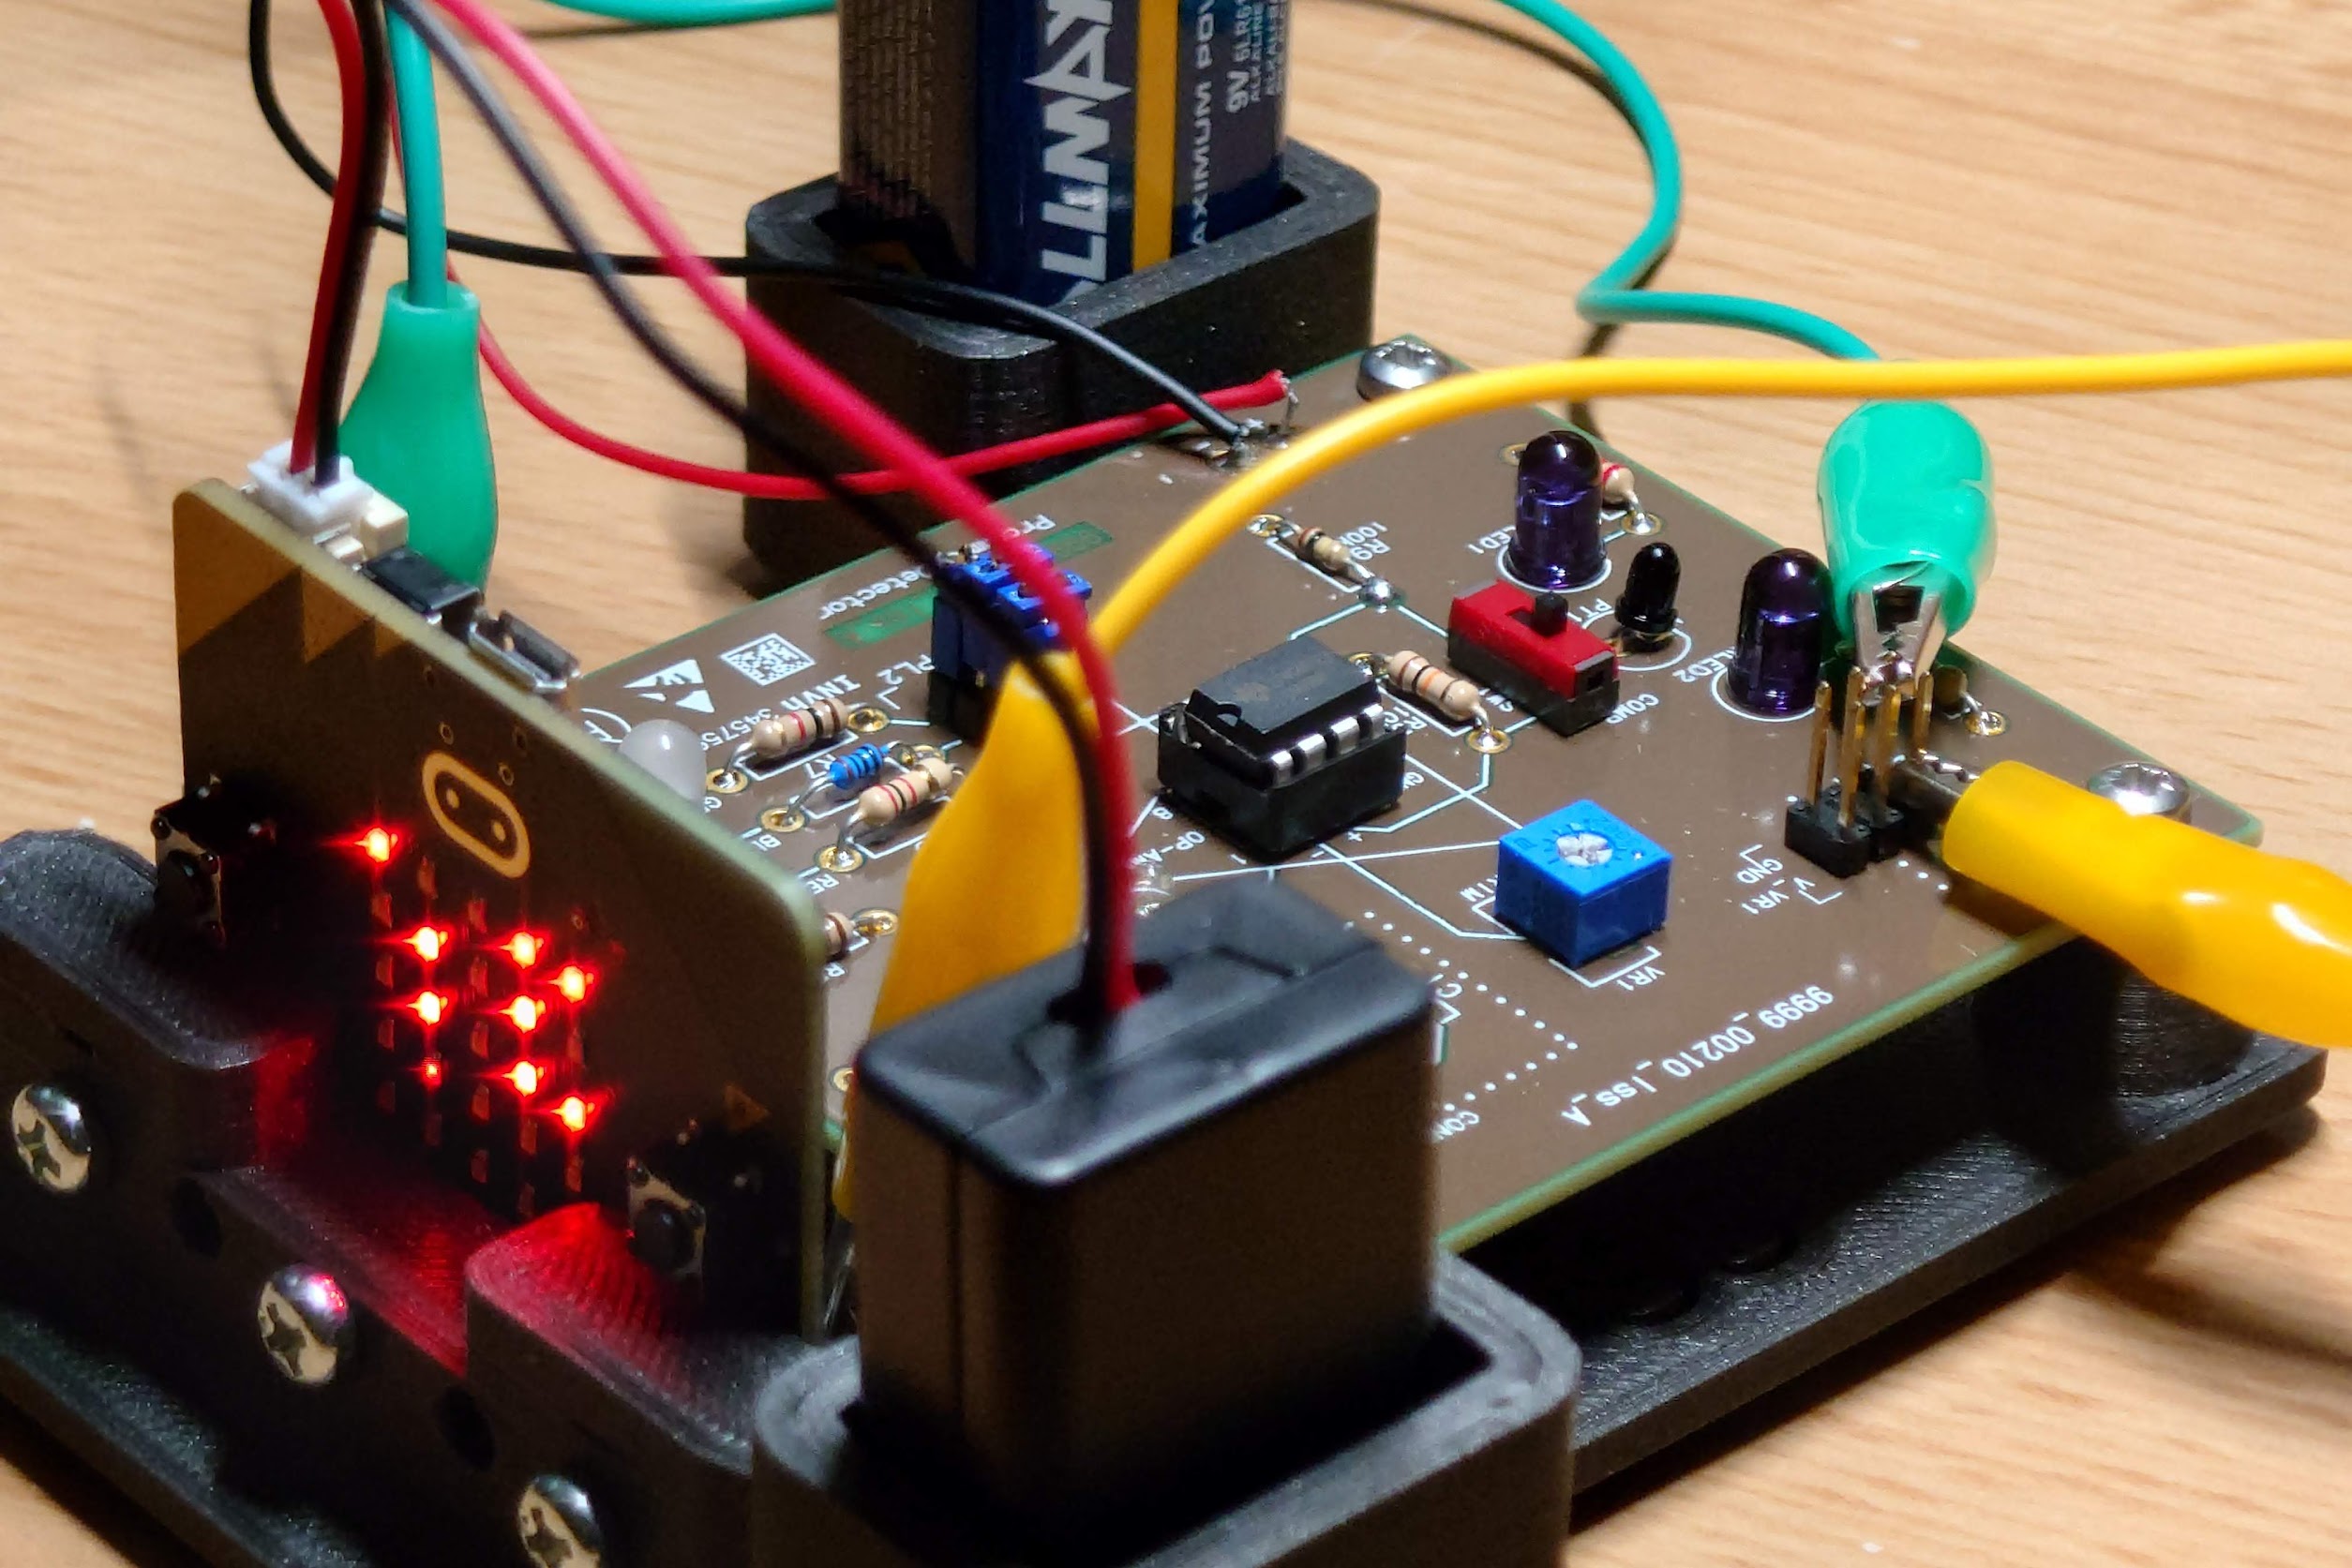
My completed proximity sensor circuit.
The general idea is that the IR LEDs and sensor on the left detect how far away an object is, and feedback is provided in one of two ways. The first way is shown - the RGB LED changes colour and brightness to indicate proximity. The second way is selected when the red switch is toggled, and this would result in the other LED turning either on or off, depending on if the object is close enough to pass a set threshold (the threshold can be customised using the blue potentiometer).
So, notice anything? The first representation is continuous, analogue. The second representation is discrete, digital. The buffer is used in the first method, as it outputs a varying current with a consistent voltage. The closer an object is to the sensor, the stronger the signal it produces, and thus the greater the difference between the two inputs on the OpAmp is, increasing the current of the output.
This current goes through the resistors R5, R6, and R7 to vary the colours in the LED depending on distance. Great! Method 2 uses a comparator. The OpAmp essentially compares the two input voltages. If the non-inverting input (+) is greater than the inverting input (-), the supply voltage (9V) is sent to the output. This causes the LED to turn on. Otherwise, 0V (GND) is sent through and the LED remains off.
The inverting input can be thought of as the reference voltage, as it represents the threshold at which the LED is turned on. This reference voltage is from the 9V input, but modified using the potentiometer to alter the threshold as desired.
Phew, that was complicated.
The engineers explained other concepts, such as how the potentiometer is just a coiled-up potential divider, how a three-prong switch works, the maths of a diode, and how complex numbers are used to represent values in an AC circuit due to their 2-dimensional nature. There was even a sprinkle of argand diagrams and second-order differential equations!
All in all, they did a fantastic job at sharing their understanding and knowledge with us. To see all my A-level Maths and Physics being used in practical settings was super eye-opening.
To cool down, we ended the day with a visit to their makerspace and labs. After a detour to look at the offices and some more cool projects, we entered the makerspace. It was pretty standard, but I like how more and more companies are encouraging their employees to spend some time making their own things, and giving them the resources to do so.
Finally, we went into one of the labs. These were where Leonardo tests/develops EM equipment. They have to do their work in isolated areas - so as to ensure they don't break the law by using unlicenced frequencies or jammers. Especially because an airport was nearby... you wouldn't want to jam their comms with flight control!
These labs were essentially just metal rooms - Faraday cages to block out every EM signal from the outside and vice versa. To get in, you'd have to go through a set of two (metal) doors, only ever keeping one open at a time. The doors were very cool - pressing the button and opening it felt just like a sci-fi film with all the pneumatic sound effects! And if both doors were opened at once, the power to the room would be cut off immediately so as to ensure no signals escaped.
The labs themselves were as expected - lots of computers, servers, and random equipment. There was a nifty jammer drone that would fly over a region and jam everything. I so badly want one...
Anyway, that marked the end of day 1, and after nabbing a delicious bubble tea at Truedan, I went back to my home for the week.

Best bubble tea I've ever had :P
Day 2
The morning was all about software. We messed around with Micro:bits using Blocks and Python. I had used Micro:bits extensively before, so I mostly took the time to talk to the apprentices leading the session and the other students. The main languages used at Leonardo are C and C# - and Python/MATLAB for the systems engineers.
The Micro:bits were the V2 - I'd really wanted to mess around with these ever since they came out, but never had a good reason to get one. So I was pretty excited to make use of the microphone, piezo, and touch sensitive logo. It was quite cool, and I even tried getting a voice speaking on the piezo but it was comically robotic!
The software tools for the Micro:bit improved drastically since the last time I used one, and it was epic to see the continual development towards computer science education in the UK.
After another tasty lunch (with massive portions again), we had the antenna session. None of us really considered antenna engineering as a thing, but I guess every niche exists and this niche is fairly important for a company like Leonardo.
The engineers taught us the theory behind antennae, recapping physics principles such as polarisation. They then went straight in and explained all sorts of concepts, such as passive/active radar, bandwidth, return loss, gain, impedance etc. And they showed us examples of these technologies on planes in service. A lot of their work comes from a customer (generally the Government) asking to equip their plane with some specific technology, and Leonardo have to find the best solution.
We then applied a few equations to determine the required length of an antenna which can detect 2.4GHz signals (that's WiFi). Why? So we could make our own makeshift antenna!
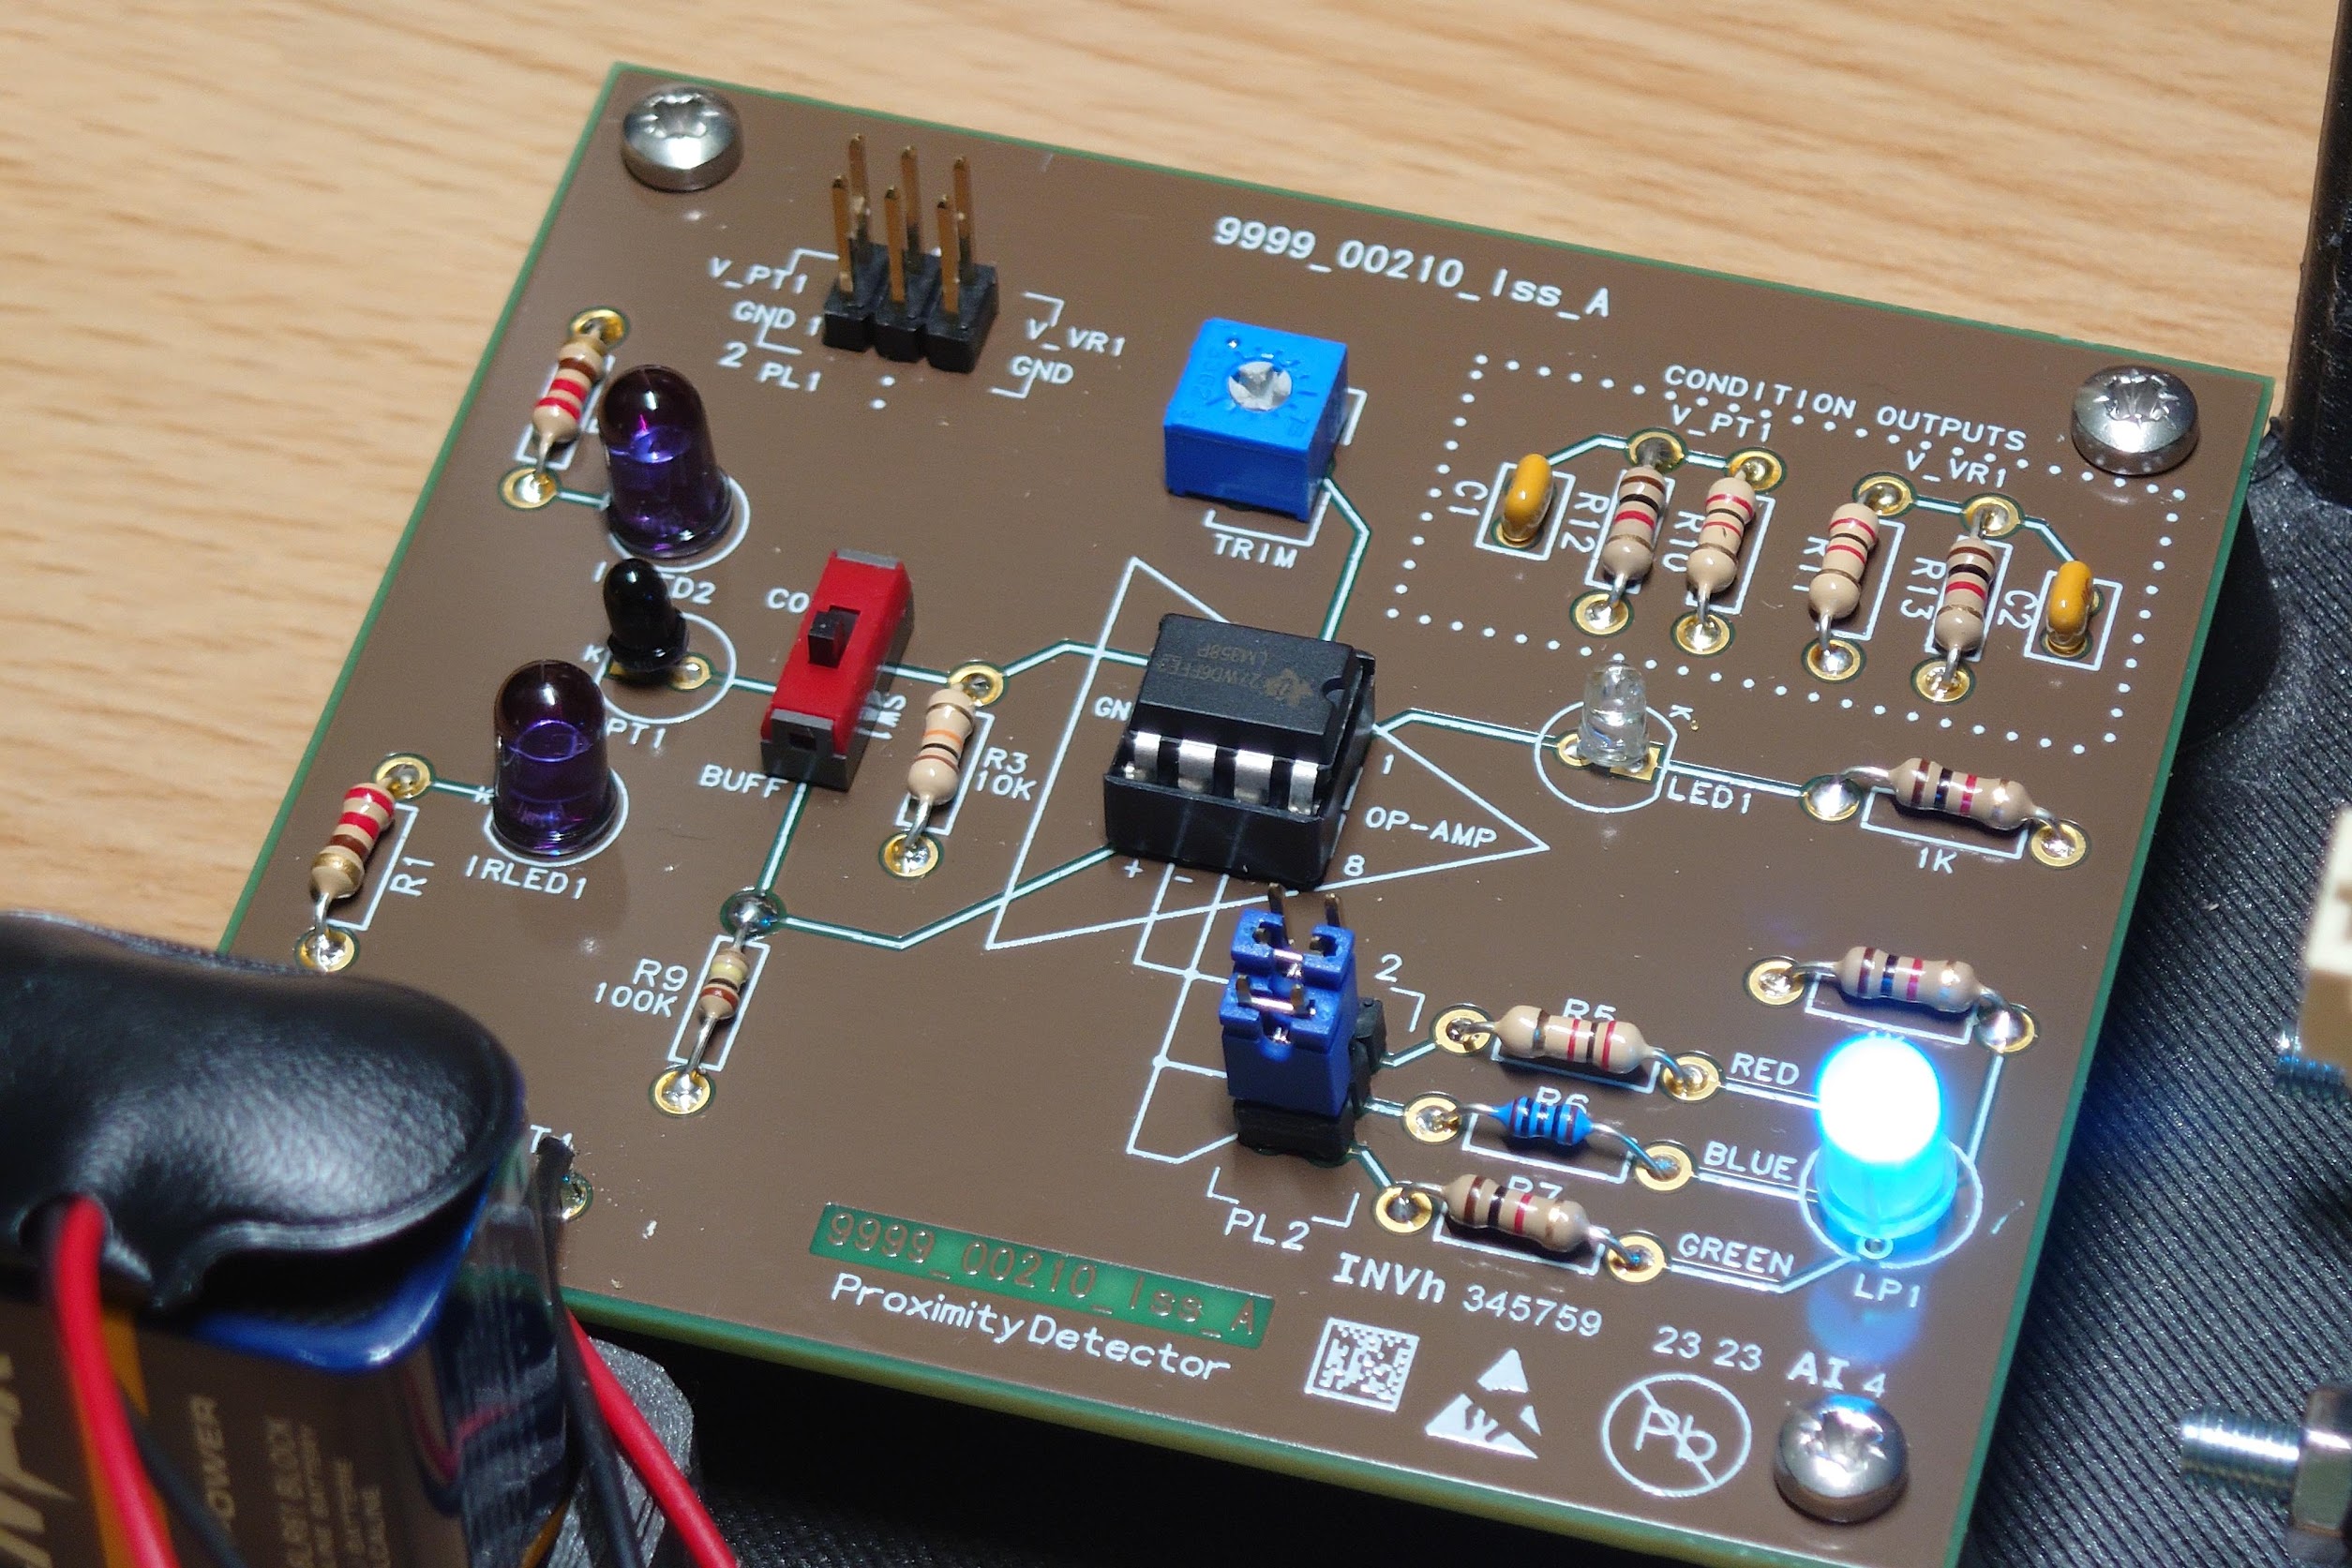
My simple WiFi antenna. It's got the copper ground plate, a wire antenna, and the connector.
We headed over to the antenna labs to test them on a £300k Vector Network Analyser (VNA). It was so old that it still used floppy discs to update the firmware. After a crash course on how to use it, I discovered that my antenna was most sensitive to 2.42GHz - pretty close to my target! I cut down the wire length to see the measured frequency go up, playing with the knobs and buttons on the VNA.
The entrance to the antenna lab had a sticky shoe pad to minimise the FOD (foreign object debris) - a single spec of dust can ruin the connection between an antenna and a machine. And I was told that the machine's connector is manufactured to such precision that it costs £10,000!
We also got shown some cool antennae, such as spiral shaped antenna which are used to maximise the reliability of a ground receiver due to the plane of the aircraft's transmitter varying throughout manoeuvres.
We were taught about radomes, solder resist (hence why PCBs tend to be green), and how varying configurations of an antenna can affect its properties. All in all, antenna engineering was epic!
Before we left, we had a look at their largest anechoic chamber. Boy, was I excited! I'd seen so much about them online, and would've seen one at my work experience with Cambridge Consultant if it wasn't broken. An anechoic chamber is a room that blocks all EM signals. What makes it special is that the 6 walls are designed to absorb all waves - so there is no echo inside.
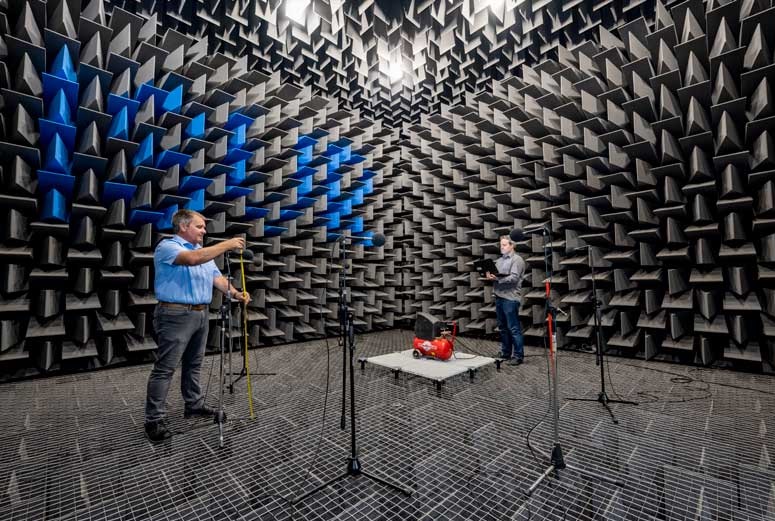
An example of an anechoic chamber. Man, these are cool!!!
Stepping in the chamber was awesome! Everything was muted, and you had to talk quite loudly for someone to hear you. The foam lining the surfaces was designed to ensure any reflections would not go straight back to their source - they'd instead bounce around between the spikes until they dissipate. Foam was used to help absorb the wave energy, and it was laced with various substances such as carbon to further increase absorption power.
The technical term for this is Radiation-Absorbent Material, or RAM.
A fun fact we were told - if there's a fire in the chamber (perhaps caused by overheating components), you've got to escape and shut the door as fast as possible. Pure cyanide is produced when the RAM burns, so you wouldn't wanna be in there!
They had a setup installed to test antenna transmission. There was a 3-axis mount for the transmitter, and a sensor across the chamber. The mount would rotate in tiny increments and test every orientation of the antenna to build up an intensity map. This process would take weeks for a single antenna! Good thing they had multiple chambers.
Usually, the primary aim when designing antennae is to channel their energy/sensitivity towards the specific direction required - otherwise, huge amounts of energy are wasted, the antenna is less stealthy, and it can be jammed easily. There are all sorts of intriguing tactical decisions that antenna engineers must consider when designing.
So, after an epic day at Leonardo, I topped it off with a trip to London's Twist Museum and ended with some delicious ramen.
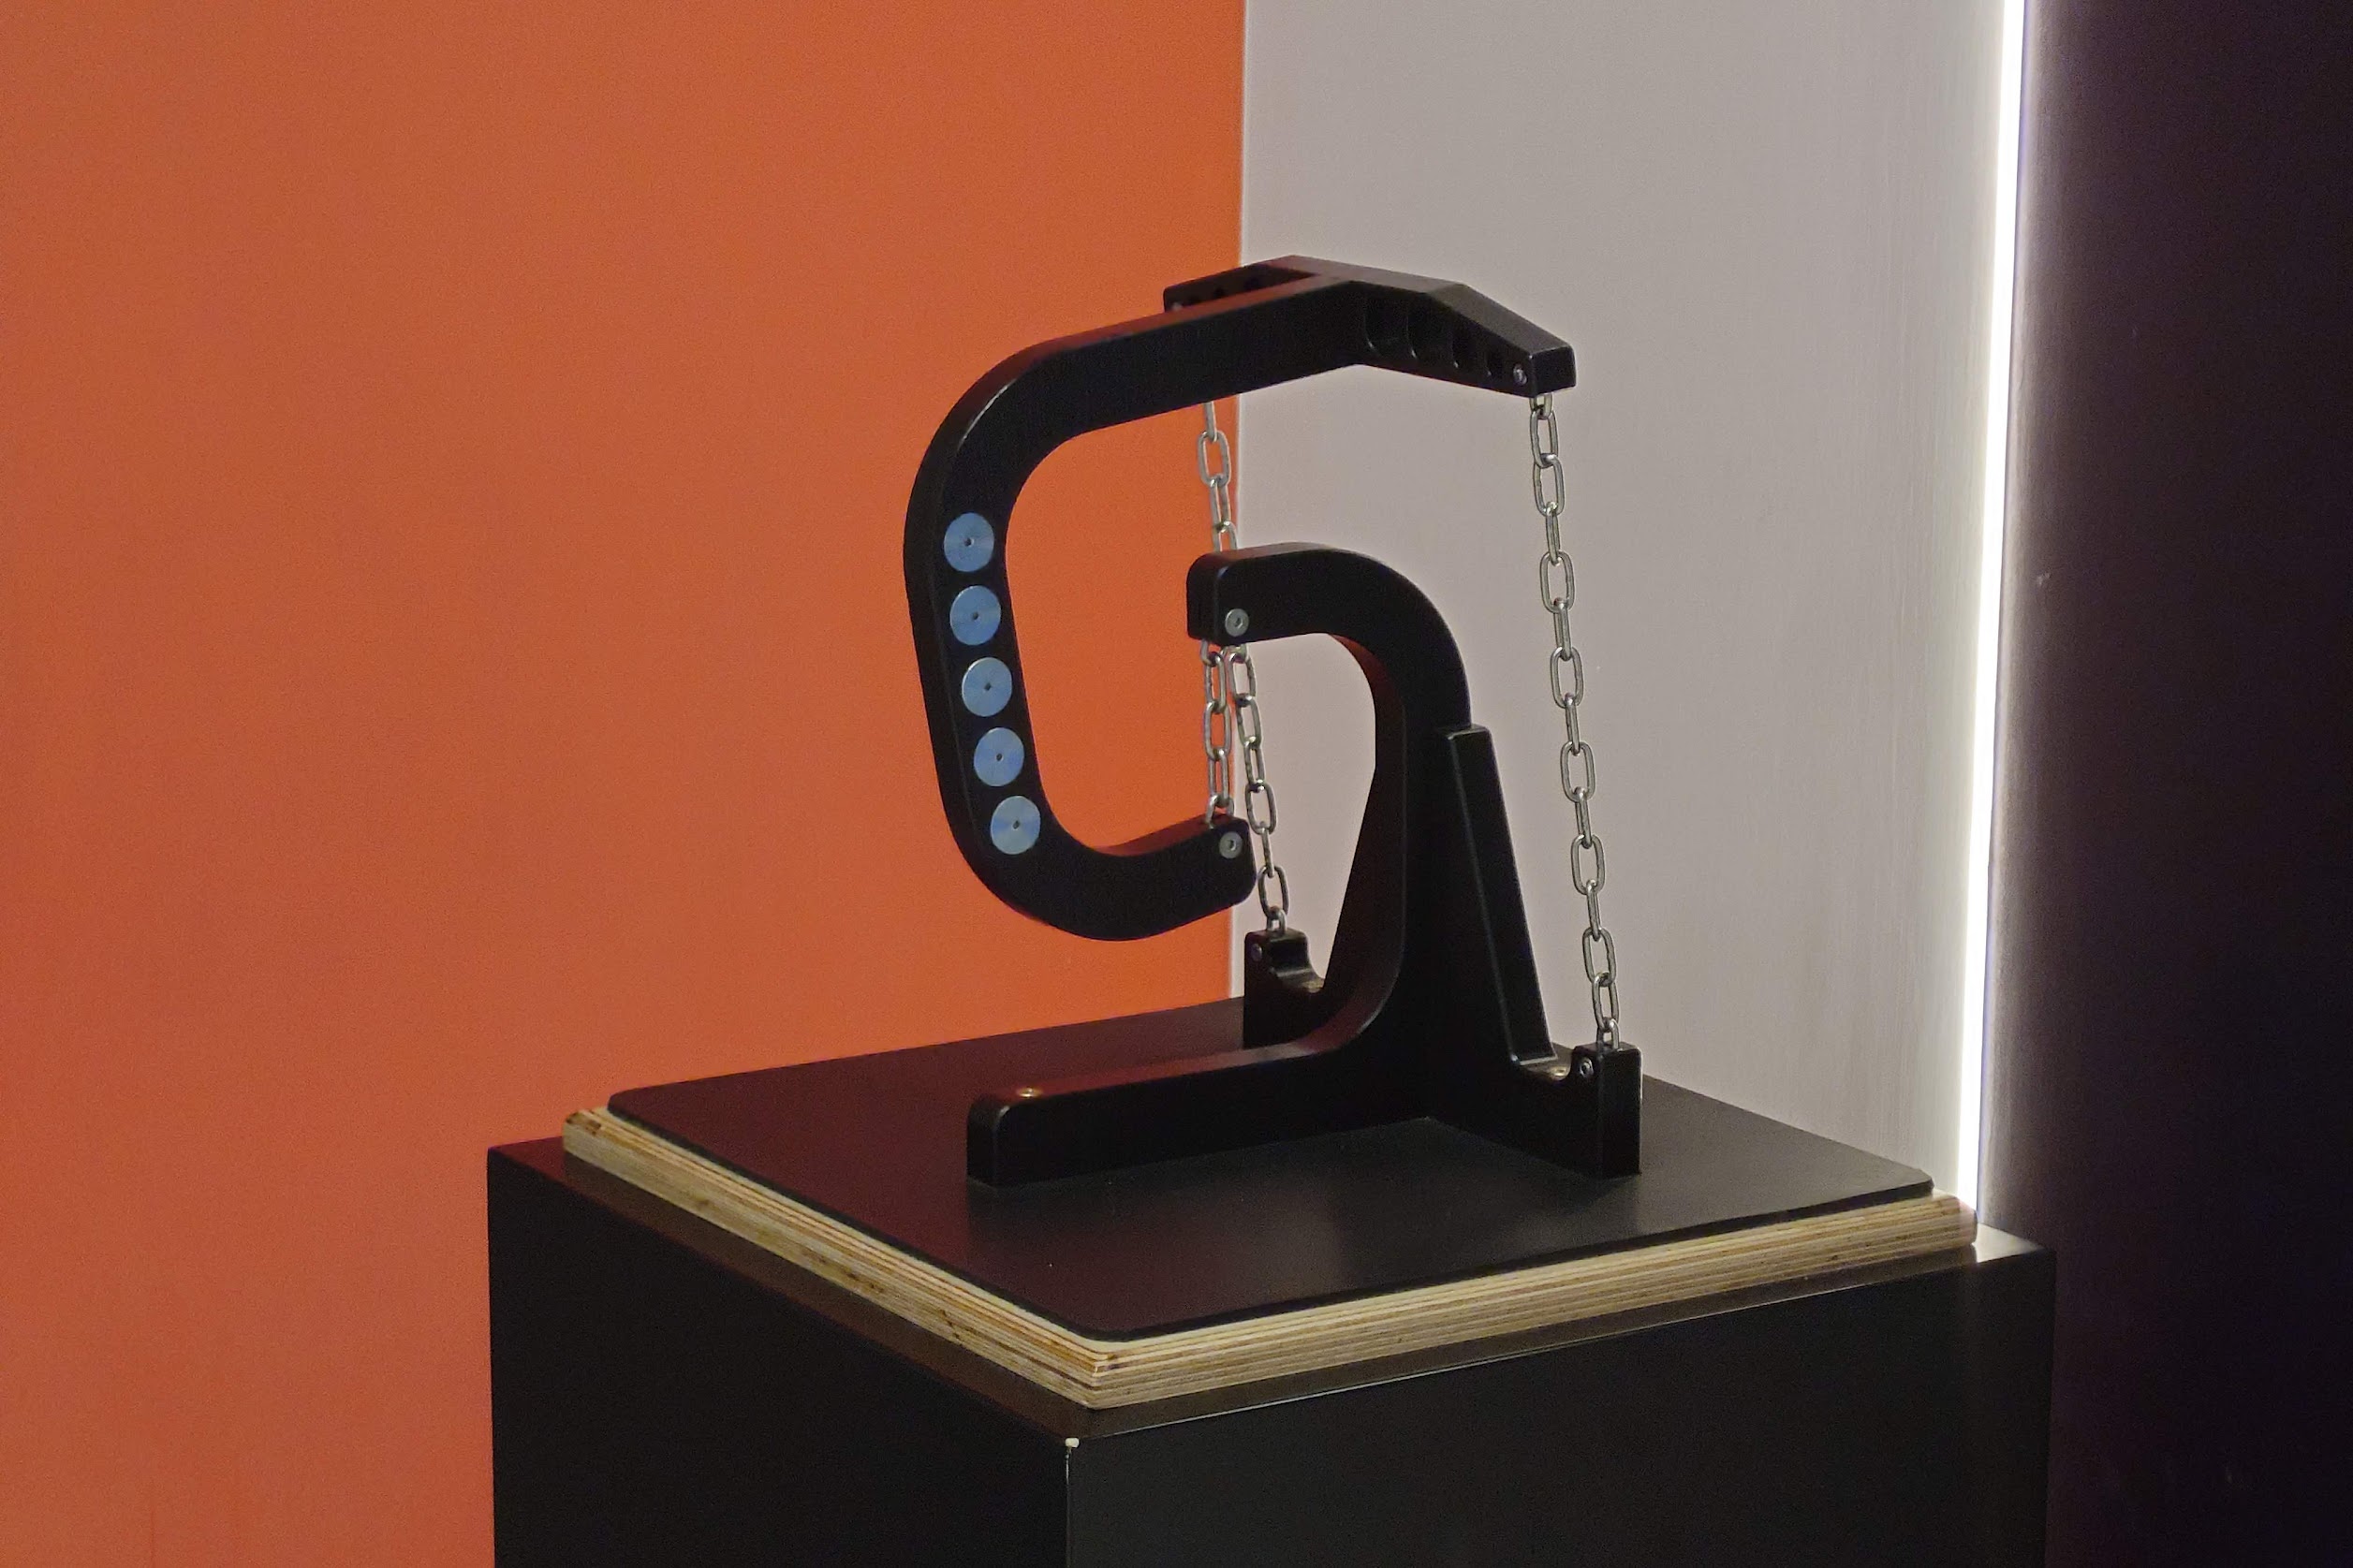
The Twist Museum. This made me super excited - I finally saw a tensegrity structure in person!! If you have no clue what this is, Steve Mould created a nice video on them.
Day 3
I reached in the nick of time and met the others just as they were leaving to start the day. The electronics engineers from Monday, Solomon and Ahmed, took us to the makerspace to do some soldering. The goal was to finish the proximity sensor board that morning.
So, using some nice soldering irons with in-built filters (we had leaded solder), I got to work. The process was fast and error-free for me - though a couple of people burned themselves and others had faulty components.
I chose resistances for the RGB LED which would mean the red hue would always be slightly on, then the green would appear as the object got closer, and finally blue. I grabbed some more jumpers and played around with different configurations to vary the colours. I also tuned the potentiometer until I was happy with the sensitivity of the LED.
It worked!
I spent some time chatting with the degree apprentices about their experience. They were all overwhelmingly positive about Leonardo, saying how they give you plenty of time and support to upskill yourself and work on projects. This is really reassuring to me, as that's something you'd get at university but could easily be missed in an apprenticeship.
I sat with Ahmed during lunch as he told us all about the culture at Leonardo, and how to ace assessment days. The office seemed to only have old people or young people - Ahmed said that's because Leonardo stopped hiring for 20 years before realising that they needed a much greater workforce to replace the current retiring one. So they mass-hired graduates and apprentices to learn from the experienced engineers, hoping that 2 or 3 inexperienced employees could make up for 1 experienced employee.
This did mean that the culture at Leonardo was fantastic - it was full of younger people and it genuinely gave off some uni vibes. You'd definitely be able to get a good level of "uni life" experience as an apprentice here!
Ahmed then discussed how we need to stand out at assessment days, and sell ourself as a character. With hugely competitive ratios, standing out is the only way to guarantee being seen. He said to always talk to people, as the recruiters are observing you at all times. Ahmed told us to use our experiences/projects/hobbies to demonstrate the skills we have, and apply them to engineering to show the interviewers the value we'd have to the company.
We talked for even longer, about the geeky nature of the engineers at Leonardo and how passion was critical to success. It was an awesome chat, with plenty to learn from it!
After lunch, Solomon gave us some circuit analysis challenges to complete. They were quite difficult, reminding me of Isaac Physics questions. He also tasked me to calculate the maximum frequency of the capacitors, before explaining why it has a cut-off to prevent interference, and how you can get a lower bound as well with a more advanced arrangement of components. He discussed the issues with such scenarios and how engineers overcome those problems.
Once everyone had a working board, we headed back to the room to meet some mechanical engineers. We learned about their roles, including the strong similarities between aerospace and mechanical engineering - they both involve the same skills and even software, but used in subtly different manners.
We spent a couple of hours designing a housing for our proximity sensor project in Creo Parametric. It was quite similar to OnShape or Solidworks, so it didn't take long to grasp. It was a nice, relaxing task and helped brush up my CAD skills.
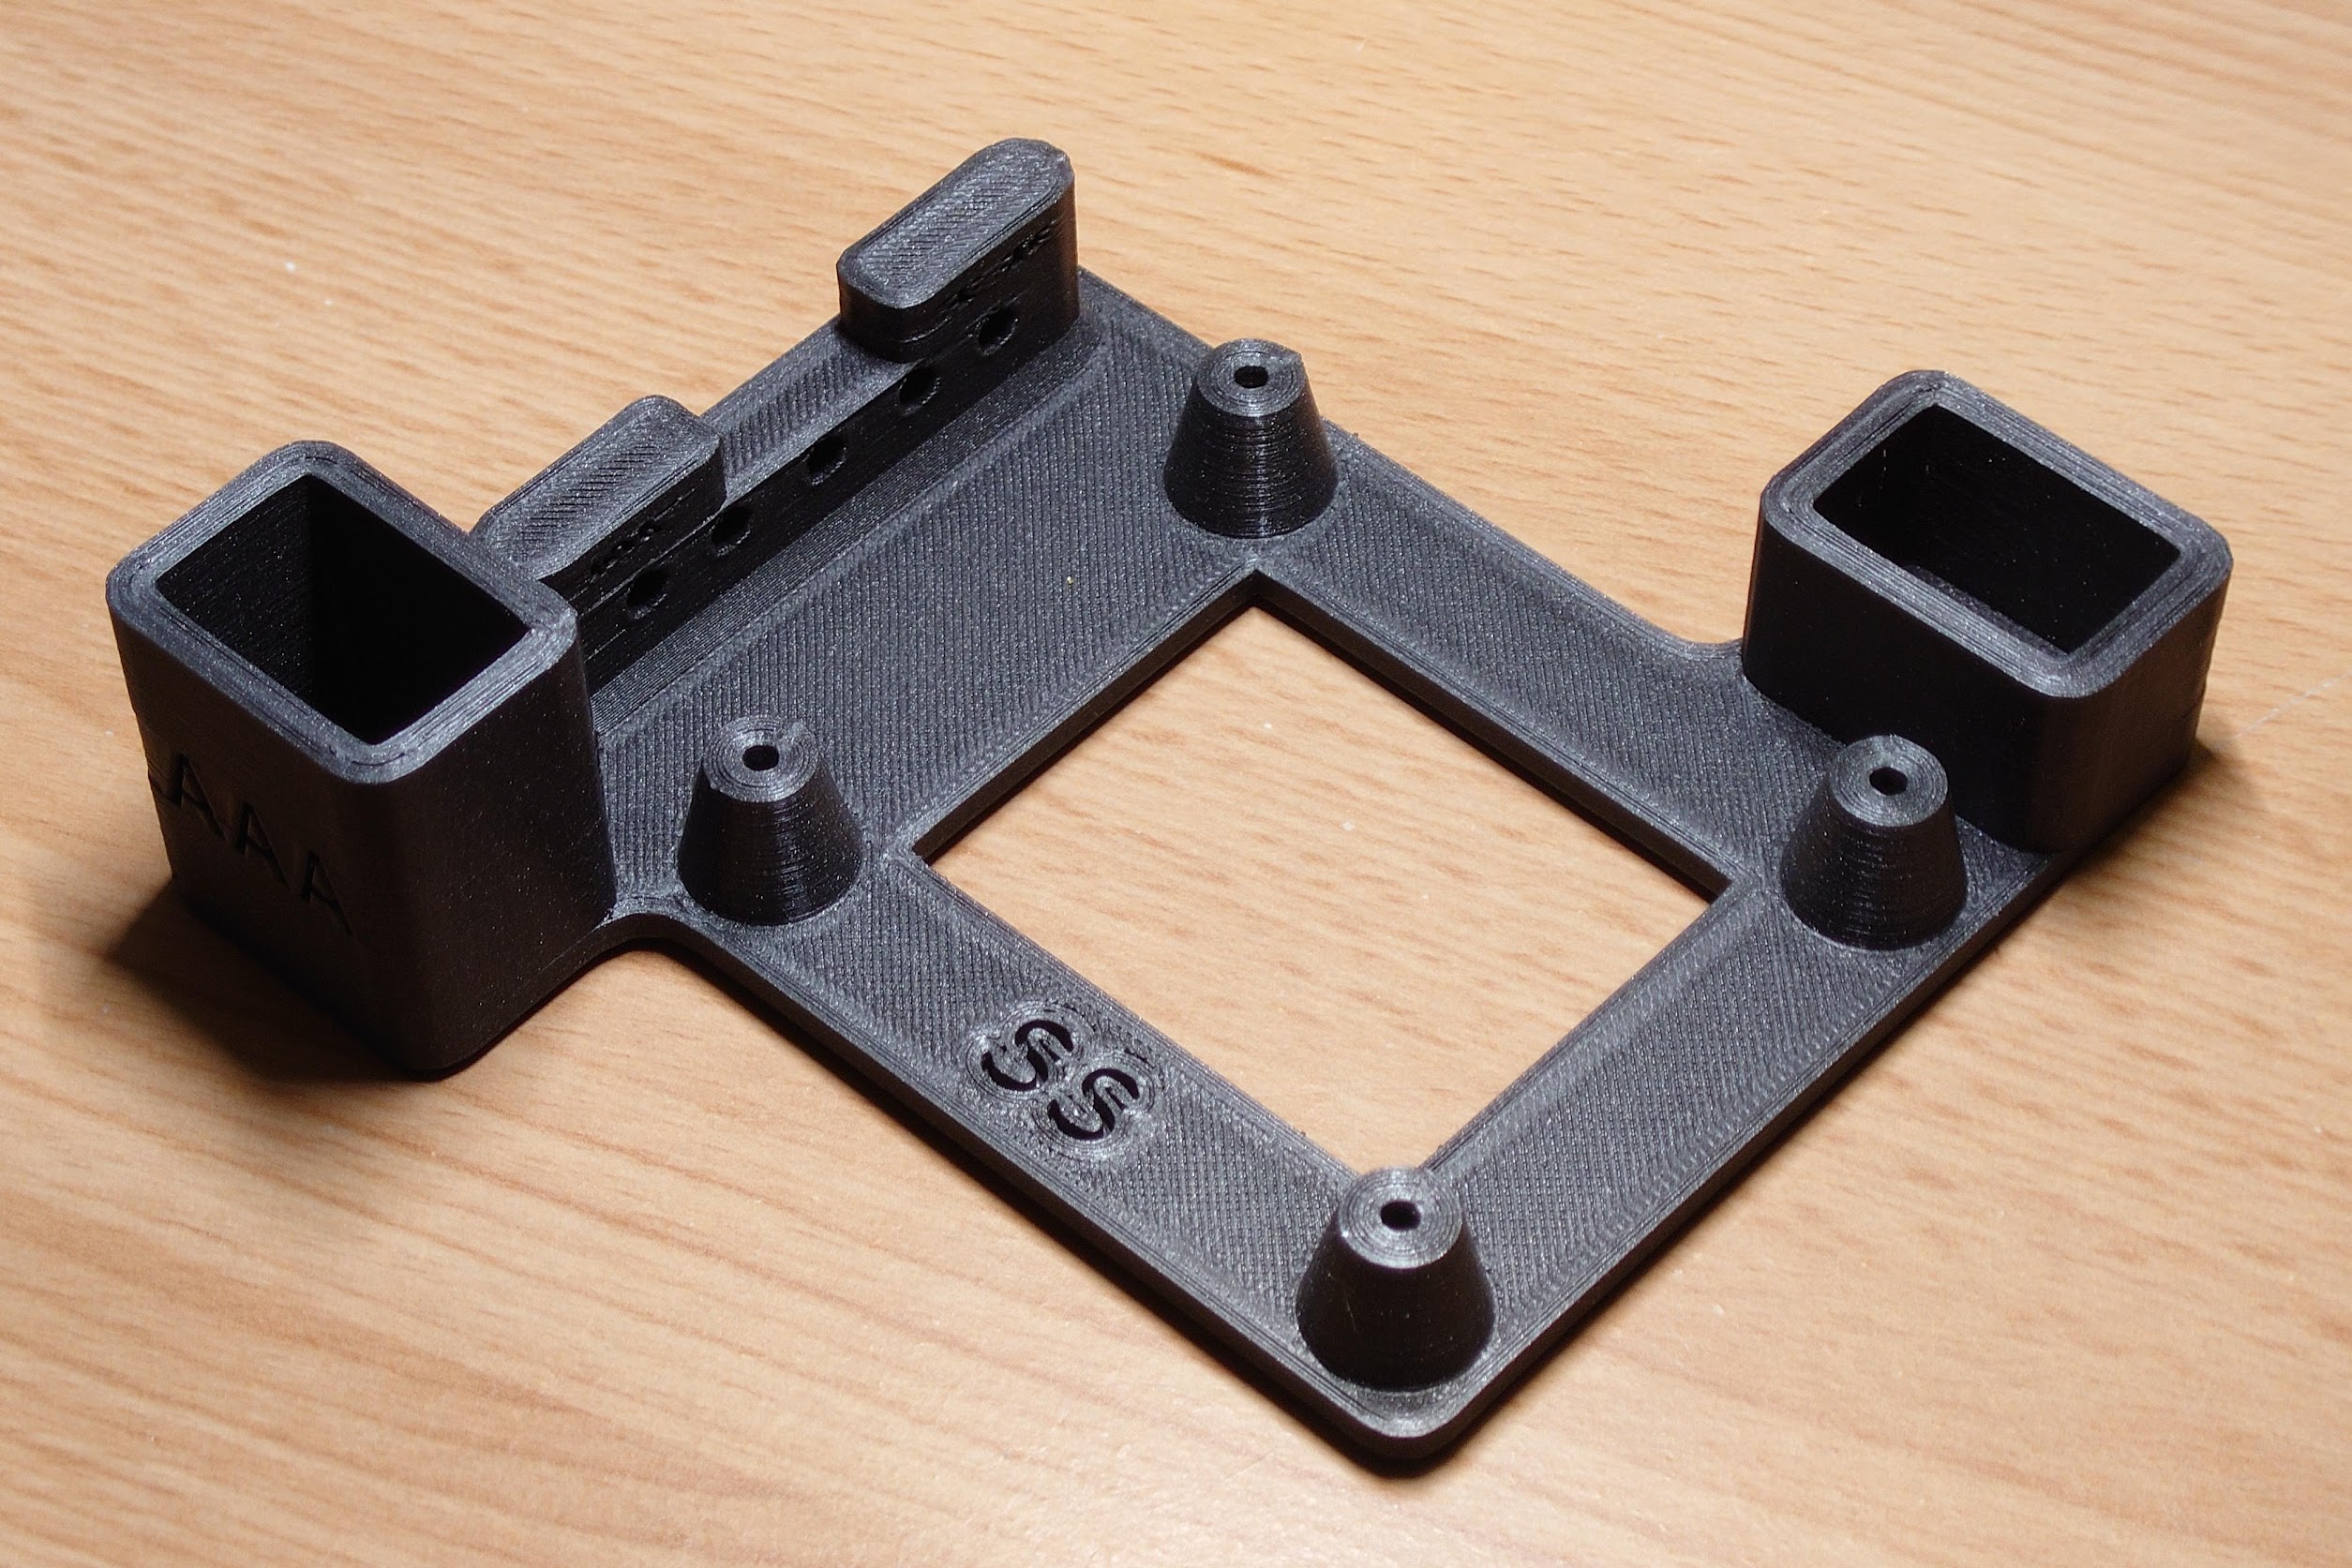
My finished housing. Interestingly, the bottom of the print had this carbon-fibre-like texture. It turns out they used a textured print sheet. I'd never seen one like it, but presumable it helped the first few layers of the print stick to the print bed as they snugly fill the gaps in the pattern.
The engineers were commenting on how the industry likes using outdated versions of software - I remember seeing a Windows 7 computer in the makerspace. They say this is for reliability and security, but in reality, I'm sure the effort to migrate is a big decision factor!
Day 4
Today was all about software engineering, working on one project. We started by playing around with a Minibit (a buggy kit powered by the Micro:bit), flashing the LEDs with the Neopixel library and moving the robot with the motors.
We developed functions to make controlling the buggy easier and do turns, constantly testing and iterating our code. The buggy wasn't particularly consistent - it would veer off slightly instead of going straight. Also, when writing code to travel a specific distance, the same code would not work for both small values (~10cm) and large values (~50cm). A similar issue occurred with turning; a function to turn X degrees would maybe work with 45 degrees, but not 120 degrees.
Whilst hardware inconsistencies were definitely part of the issue, the physics of the robot's motion meant the scaling was non-linear. For example, after a turn, the robot's momentum would swing it a little further than desired. This varied depending on how long the intended turn was, and so I needed to optimise my code for different ranges of distances/turns. How long I waited after a turn also affected it - moving forward instantly would prevent the robot from swinging any further.
After lots of tuning and adding nice light effects, I was pretty happy with my progress and it was time for lunch!
We were then introduced to our final challenge with the buggies - complete a course and fulfil tasks along the way, making use of the Micro:bit array and LEDs on the chassis. The afternoon was a chilled experience, and we spent lots of time chatting whilst working on the robots.
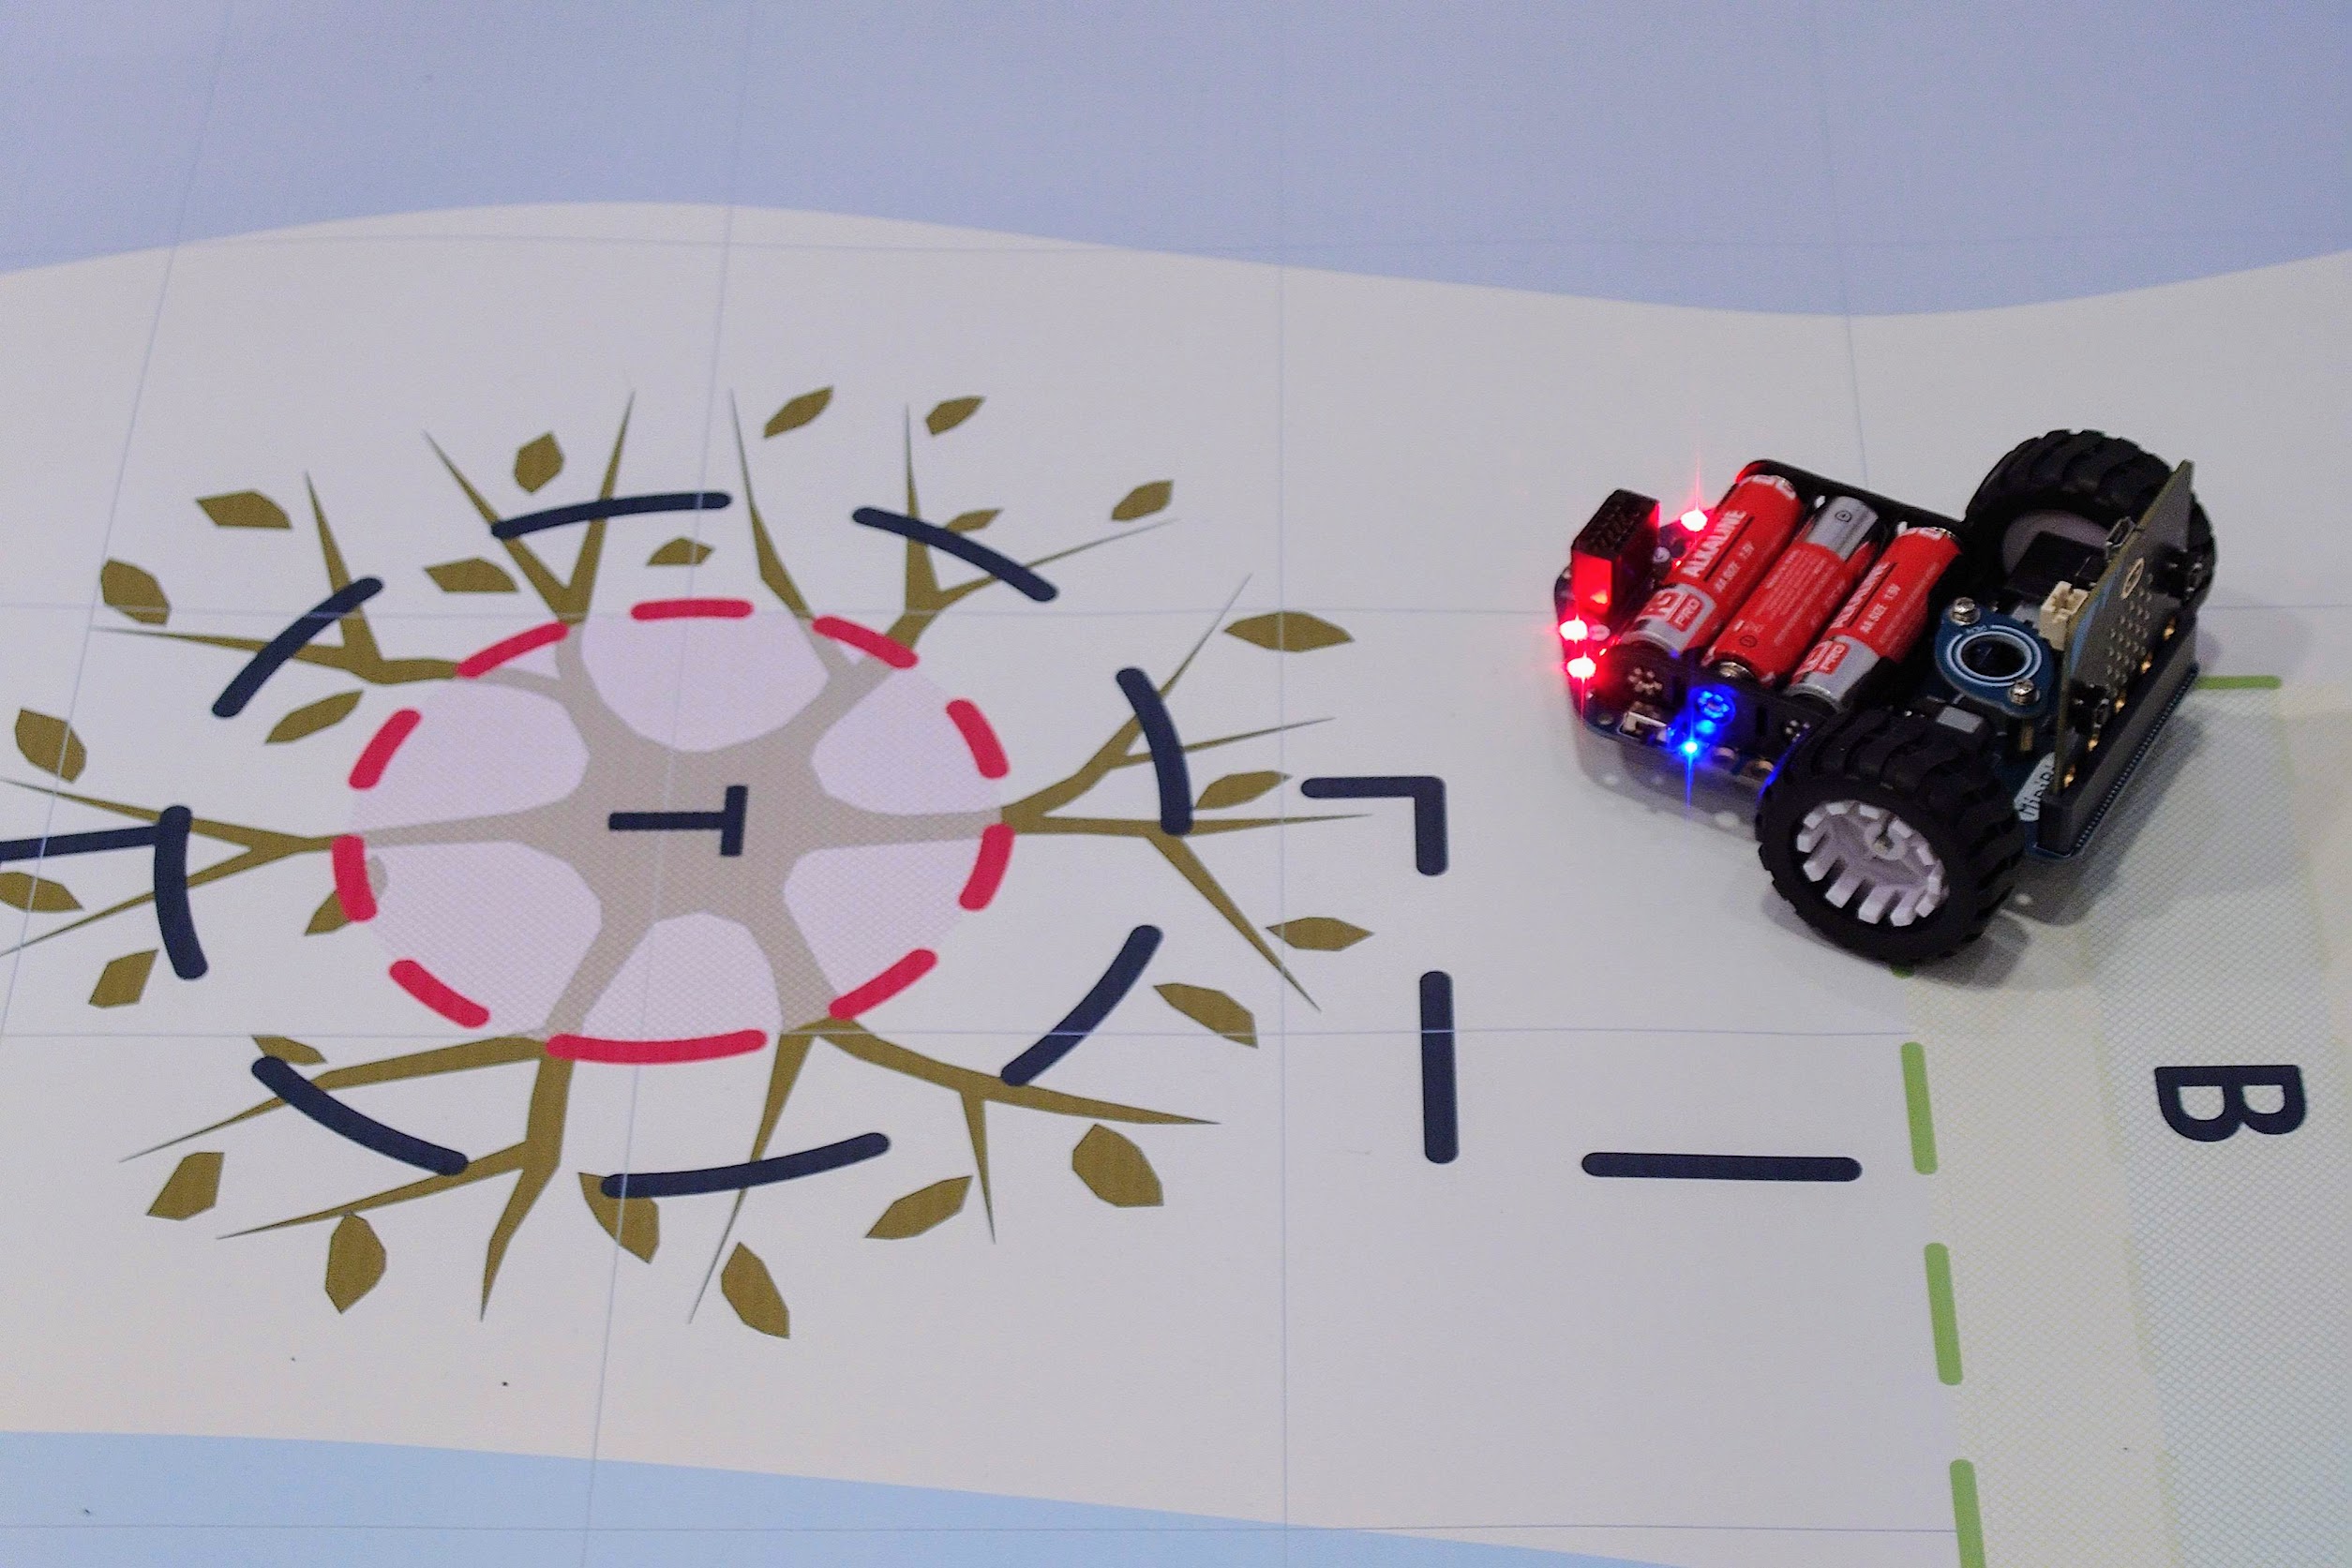
Testing my Minibit on the course. The surface of the paper was different to the tables, so I had to re-tune all my values!
After lots of time spent optimising the robot to complete the course, we did one final run in front of each other. And the winner? Well, none of the robots quite managed to complete the course!
The inconsistent nature of the hardware made it more of a lottery than a talent game. It was interesting to see everyone's approaches though - that's one thing I love about engineering. Given the exact same problem and the exact same resources, 7 people came up with 7 distinct solutions.
My primary method to move was by creating arcs - turning and moving forward simultaneously. Some people went slowly, some error-corrected over time, some did lots of small jittery movements, and so on. Every time I saw a new robot do a run, it sparked curiosity and ideas in my head about what worked and what didn't, and what I could've applied to further improve my program.
It really reminded me of the robotics competition I ran in school with a friend this year, and I took some time to reflect upon it. I discussed what was good about today's challenge, and distilled those principles to figure out what we need to apply to next year's robotics competition. It came down to getting hands-on quickly, abstracting everything so everyone understands it, and providing plenty of room for expansion for those who are more experienced.
One big point for our competition is to make the robots more reliable. We'd thought that higher quality components would completely solve the issue, but today proved that wrong. The Minibits had the same motors and similar wheels to the ones we're planning to use - yet there was still lots of unreliability. I'm thinking the only way to solve this is to have some sort of external sensor, like an encoder. That idea was vouched for by one of the engineers too.
Something interesting that the software engineers said was that they only spend ~3 hours a day writing code - the rest of the time is dedicated to meetings, admin, reviewing, etc. To be honest, that's something which really sucks about engineering in a big firm; there's a lot of talk and less action.
Anyway, by the end of the day, everyone had a blast and I went back, after enjoying a delicious waffle :)
Feeling 'healthy', I only went for a half-waffle...
Day 5
The final day! We started off by tying everything together and completing our project. We mounted it all to the housing, and used the Micro:bit's ADC for live debugging, to show the voltage received from the IR sensor.
Ahhh, that was satisfying.
My completed proximity sensor board.
Finally, we each threw together a presentation of the week and our project, delivered it, and received our EDT Industrial Cadets Silver Award. The week ended with us all getting a goodie bag, which contained various Leonardo-themed items and the classic early-careers ads.
The 7 of us parted ways, and after a fabulous time together, we shared some contact details so we could hopefully meet again some point soon.
Final Reflections
I learned plenty from the week, but there were 2 key insights I took away. First, it seemed like a degree apprenticeship could be the better option for me - and I need to be very careful in which company I choose (assuming I get more than 1 offer!). A company like Leonardo gives their apprentices lots of time for personal development, and the staff there are all quite geeky. Both are great, but not every firm has that.
I found it quite interesting how most of the apprentices we met did 'meh' on their GCSEs/A-Levels, but seemed to all be on track to achieve a first in their uni course. The environment provided by an apprenticeship can really change how well you learn!
Secondly, I gathered some important lessons from Thursday to take into my robotics competition for next year.
On the whole, I discovered a lot about the industry, loved the anechoic chamber, and had a great time with the other students. A massive thank you to Leonardo and all of our hosts - especially Solomon and Ahmed (the electronics apprentices) for being so enthusiastic and engaging. The antenna engineers were also awesome!
This marked another step in my relentless pursuit to always learn more and keep on meeting interesting people, so I'm grateful for the opportunity provided and would recommend it to anyone! Thanks for checking out this article :)
copied!
failed to copy!